
To perform a solo kayak self-rescue in a suitable sit-inside kayak, we recommend a practiced paddle-float re-entry. Wet exit, regain breathing control, secure the float, right the boat, and climb aboard using the paddle as an outrigger. Then pump out the water and restore paddling control. The float supports one paddle blade beside your kayak, giving you added stability during kayak re-entry.
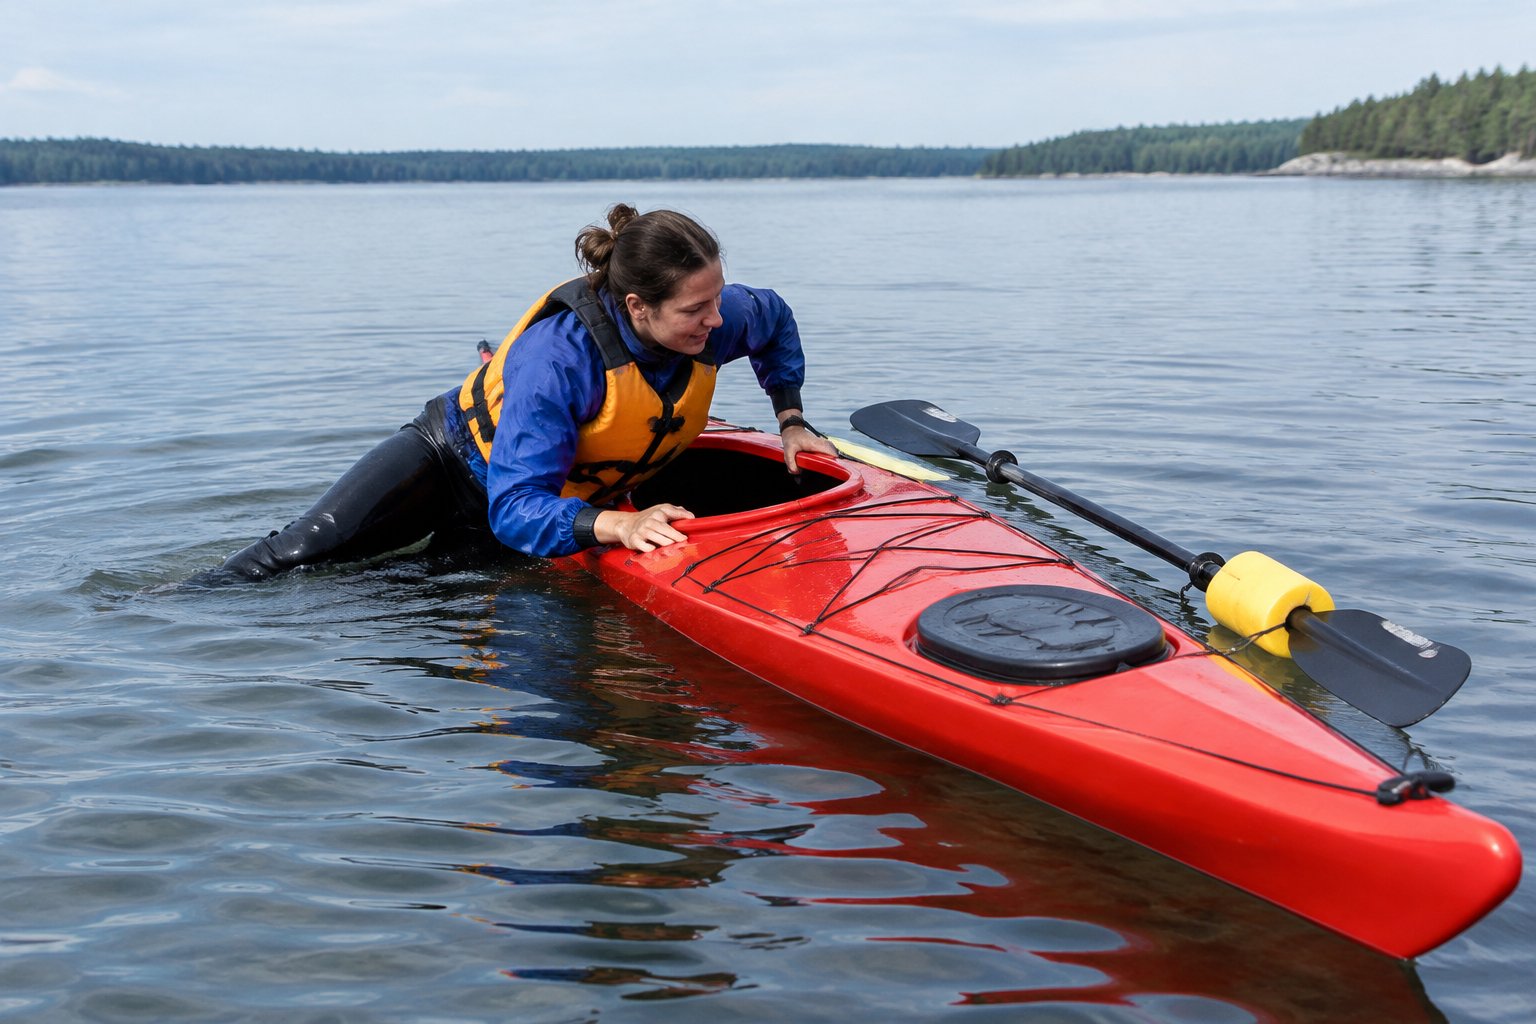
This method requires adequate kayak flotation and a rear-deck arrangement suited to the rescue. We recommend learning it with an instructor before paddling alone. A successful recovery in warm, calm water does not establish readiness for cold water or breaking waves.
Choose Suitable Rescue Equipment Before You Launch
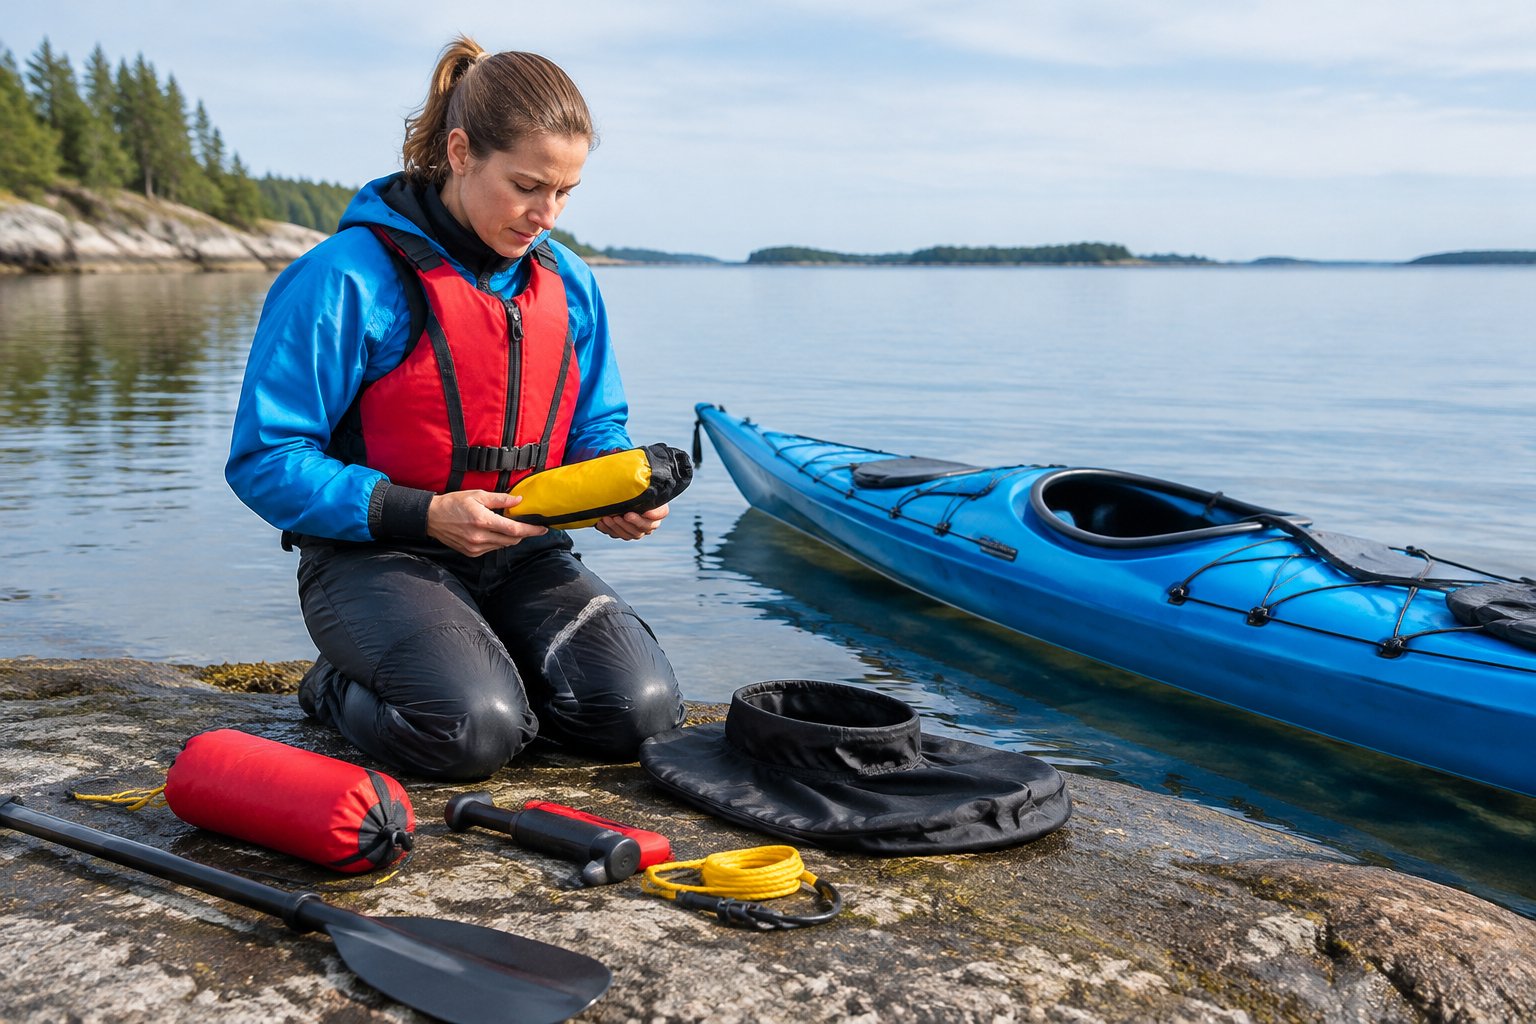
Your self-rescue equipment must remain accessible while you are floating beside the kayak. We recommend checking the complete rescue setup before every launch.
- Personal flotation device (PFD): Wear a properly fitted, fastened life jacket. Check that your life vest fits while you are seated and stays snug when you lift your arms.
- Paddle float: Choose a model compatible with your paddle blade. Learn its attachment system and inflation valves.
- Bilge pump: Secure it within reach from the cockpit and water.
- Immersion clothing: Choose a drysuit with suitable insulation or a wetsuit appropriate for the water temperature and expected exposure.
- Communication: Carry a waterproof VHF radio on your PFD where marine VHF service is appropriate. Keep another suitable emergency device accessible where needed.
- Paddle leash: Discuss its suitability with your instructor. Leashes create entanglement hazards, especially in moving water and surf.
Inspect bulkheads, hatch covers, and deck fittings as part of your kayak equipment inspection. A flooded kayak without adequate flotation might sit too low for this rescue, even with a paddle float.
Step 1: Release the Spray Skirt and Perform a Wet Exit
A wet exit frees you from an overturned sit-inside kayak after you release the spray skirt. We recommend practicing this skill with an instructor close enough to assist immediately.
- Before launching, check the grab loop. It must sit outside the cockpit rim where you can reach it.
- As the kayak capsizes, tuck forward. Keep your head close to the front deck and retain your paddle if practical.
- Find the loop by touch. Follow the cockpit rim forward with your hand.
- Release the skirt. Pull the loop forward, then upward, to peel the skirt from the rim.
- Free your legs. Bring your knees together to release them from the thigh braces.
- Push clear. Place your hands beside your hips on the cockpit rim and slide forward out of the boat.
Allow your PFD to support your return to the surface. Keep contact with the kayak and paddle when safe, but release equipment if it traps you or blocks your exit. Ask your instructor to teach a backup skirt-release method in case you cannot find the loop.
Step 2: Control Your Breathing and Assess Immediate Danger
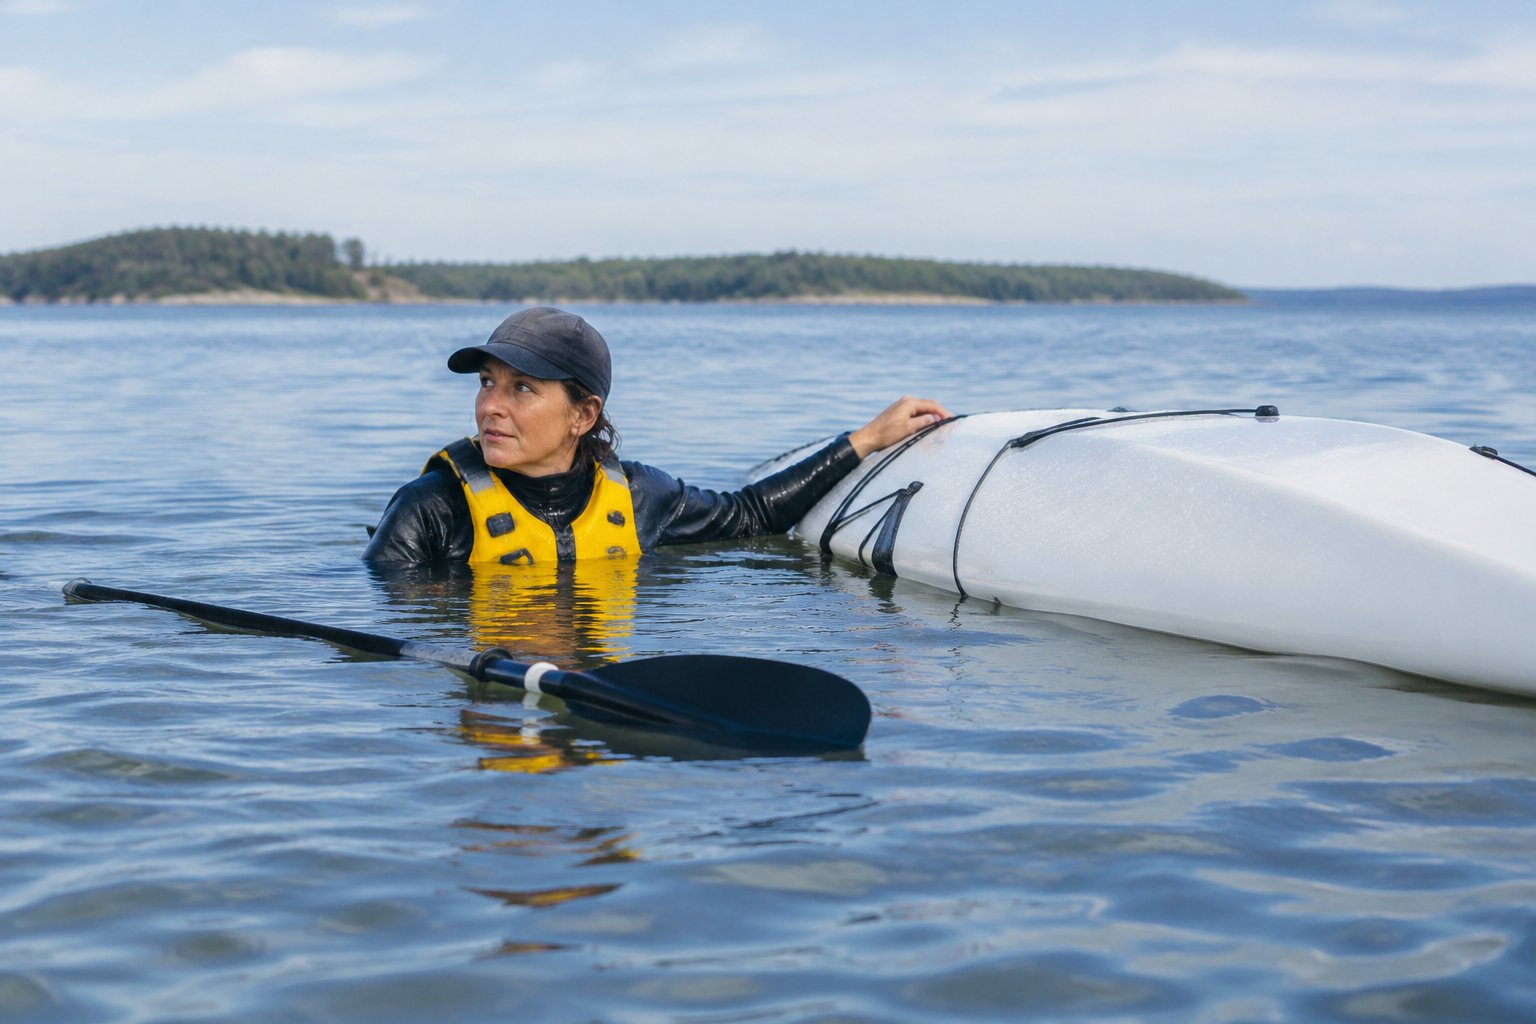
At the surface, your first priority is keeping your airway clear and controlling your breathing. Cold-water immersion can trigger gasping and rapid breathing before you begin the rescue.
Let the PFD support you while you focus on steady breaths. Hold a secure part of the kayak and check for immediate hazards, including traffic, breaking waves, rocks, and drifting toward obstacles.
Stay with your kayak when doing so is safe. Avoid chasing loose gear at the cost of losing the boat. In moving water, entrapment hazards require river-specific training. An open-water paddle-float rescue is unsuitable beside strainers or other dangerous obstructions.
We recommend calling for help early if injury, cold, or conditions threaten your ability to recover. Use your waterproof VHF radio or other emergency device while you still have hand control. Do not spend all your remaining strength on repeated attempts before signaling distress.
Step 3: Attach the Paddle Float and Right the Kayak
Secure the paddle float to one blade before setting up your support beside the upright kayak. Keep physical contact with the boat throughout preparation so wind cannot separate you from it.
- Retrieve the float from its accessible storage position.
- Slide it fully over the paddle blade.
- Fasten its retaining strap or buckle as the manufacturer directs.
- Inflate an inflatable paddle float to its working firmness, following its instructions for each chamber.
- Close the valves and check that the float stays attached when you pull on it.
- Roll the kayak upright while maintaining your hold.
We recommend learning a righting movement that suits your boat and shoulder strength. Trying to lift a water-filled cockpit clear of the surface wastes energy and strains your arms.
Expect water to remain inside after righting. At this stage of the paddle float rescue, the goal is a floating, upright boat ready for re-entry. If the swamped kayak settles too low to support you, reassess and seek assistance.
Step 4: Position the Paddle as a Stable Outrigger
Place the paddle across the rear deck, directly behind the cockpit, with the float resting on the water beside you. The shaft should sit at roughly a right angle to the kayak.
Position yourself on the float side, just behind the shaft. Secure the bare blade using the boat’s intended paddle-rescue fittings, or use the hand-held arrangement taught for your kayak. Ordinary deck lines and elastic cords are not automatically suitable paddle anchors.
For a hand-held setup, maintain a firm grip that controls both the shaft and rear cockpit rim. Test the support with gentle pressure before committing your weight.
For this paddle float technique, keep the float-side support loaded throughout the climb. Leaning away from the float removes that support and increases the chance of another capsize. Keep fingers clear of pinch points, and avoid placing your full weight on an unsupported paddle shaft.
Step 5: Climb onto the Rear Deck and Slide into the Cockpit
A low, horizontal swim-up gets your torso onto the rear deck with less lifting. We recommend keeping your chest against the deck until your hips are ready to settle into the seat.
- Float your legs behind you. Bring them near the surface so your body lies almost flat.
- Kick and slide aboard. Use a strong kick while pulling your chest across the rear deck. Maintain control of the paddle and cockpit rim.
- Bring your belly over the centerline. Keep your head low and retain pressure toward the float.
- Turn to face the stern. Feed one leg into the cockpit, followed by the other, using the sequence taught for your boat.
- Rotate toward the float. Corkscrew your body into the seat while staying low.
- Settle your feet and knees. Restore contact with the foot supports before sitting fully upright.
Some versions use a leg over the paddle shaft for support. Learn that variation under supervision because the shaft and your shoulders take added load.
A high seatback or bulky deck cargo might block the movement. Practice getting into and out of your kayak with your normal clothing and load so these obstacles become clear before an emergency.
Step 6: Pump Out Water and Restore Paddling Control
Keep the paddle float supporting the kayak while you remove cockpit water. A swamped kayak remains unstable because water shifts as the hull moves.
Place the bilge pump intake at the lowest accessible point in the cockpit. Direct its discharge outside the boat and pump while maintaining your balance toward the float.
We recommend fitting as much of the spray skirt as practical while leaving access for the pump. If your setup requires both hands for pumping, learn an outrigger arrangement that remains secure during that task.
Once excess water is out:
- Remove the pump and finish attaching the skirt.
- Confirm that the grab loop remains outside.
- Recover the paddle from its rear-deck position while maintaining support.
- Remove or stow the float using your practiced sequence.
- Take controlled strokes to check steering and balance.
Choose a safe landing and reassess the trip. Shivering, unusual clumsiness, or trouble making decisions calls for prompt action to end exposure and obtain help.
How Does Re-Entry Differ for a Sit-on-Top Kayak?
A sit-on-top kayak uses an open-deck remount, with no cockpit skirt to release. We recommend following the manufacturer’s method because seat height and hull width change the movement.
Right the boat using approved handholds. Move alongside the seating area, staying clear of pedal drives, hooks, and loose straps.
Reach across toward the far edge while holding the near side with your other hand. Float your legs behind you, kick firmly, and slide your chest onto the deck. Keep your head low as you turn your hips into the seat, then bring your legs aboard.
Scupper holes drain water from the open seating area when functioning as designed. Water inside the sealed hull needs separate attention and might make the boat too heavy or unstable for continued use.
Among recreational kayaks, a wide sit-on-top still requires enough strength and technique to remount. Include that movement in your basic kayaking skills practice before increasing your distance from a safe landing.
What Are Your Options Without a Paddle Float?
A practiced cowboy scramble or re-enter-and-roll provides another route back into a suitable kayak. We recommend learning alternatives with an instructor because boat design and balance strongly affect success.
- Cowboy scramble: After righting the kayak, climb low onto the stern and straddle the hull. Work forward toward the cockpit, lower your hips into the seat, and bring your legs inside using your trained sequence. Rough water makes the balancing phase harder.
- Kayak roll: A roll, also called an Eskimo roll, rights the kayak while you remain seated. It is an option before a wet exit if you have a reliable rolling skill.
- Re-enter-and-roll: After exiting, you return to the cockpit while the boat is overturned, then roll upright. This is an advanced skill requiring dedicated kayak roll training.
- T-rescue: Another paddler helps empty and stabilize your kayak. It is an assisted rescue, so it requires someone else on the water.
Avoid relying on an improvised rescue you have never completed. If your practiced kayak self-rescue techniques fail, signal for help while staying safely connected to the boat.
Practice With an Instructor and Troubleshoot Failed Re-Entries
Supervised practice reveals whether your rescue works with your body, boat, and equipment. We recommend an American Canoe Association instructor qualified for the type of water you paddle.
Begin in protected water with an easy landing and immediate assistance. Practice the full recovery, including pumping and paddling away, while wearing your normal PFD and immersion clothing.
Use failed attempts to identify specific problems:
| Problem | Adjustment to practice |
|---|---|
| Kayak rolls away during the climb | Maintain pressure toward the float and check paddle control. |
| Chest will not reach the deck | Bring legs to the surface and coordinate the kick with the pull. |
| Float slips off | Refit it and secure the retaining system correctly. |
| Feet catch during entry | Check footwear, loose straps, and cockpit fit. |
| Boat remains deeply flooded | Assess flotation and rescue suitability with the instructor. |
Some recreational kayaks need additional flotation or a different recovery plan. Ask your instructor to assess the boat before taking it beyond sheltered water.
Build broader kayaking rescue skills gradually, including assisted recovery. End practice when fatigue or cold reduces coordination.
Make a Practiced Recovery Part of Every Paddling Plan
A useful kayak self-rescue plan includes completing a recovery in your own boat with your normal load. We recommend checking your accessible self-rescue equipment and choosing conditions within your demonstrated ability.
Make conservative route choices when paddling alone, and leave a float plan with someone ashore. After a real capsize, head toward a safe landing and assess your condition before deciding whether to continue.
Frequently Asked Questions
Our recommendations for equipment and practice also account for storage, boat setup, and the effects of immersion.
Is a foam paddle float easier to deploy than an inflatable model?
A foam paddle float is ready without inflation, so you have one less task in the water. Inflatable models pack smaller. We recommend checking how easily you can attach and inflate either style while wearing your paddling gloves.
Should you open a hatch to drain a flooded recreational kayak?
Keep hatch covers secured during an on-water recovery unless the manufacturer specifies a suitable procedure. Opening a hatch exposes flotation space to incoming water. We recommend emptying the cockpit with the appropriate pump or bailer.
Should solo paddlers still practice a T-rescue?
Yes. We recommend practicing a T-rescue because another paddler might be available to help during an incident. Training in both roles also prepares you to assist someone else without losing control of your own kayak.
Does a warm day remove the risk of cold-water immersion?
Warm air does not remove the risk if the water is cold. Choose immersion clothing based on the water temperature and expected rescue exposure. Then consider the wind and air temperature when assessing comfort while paddling.