
We recommend rigging a kayak for fishing by arranging essential gear within seated reach, securing your safety equipment, and installing an anchor trolley that moves the anchor’s pull point to the bow. Add rod holders and storage after checking your paddle clearance. Then fit electronics if they serve your fishing needs. Every attachment should preserve your ability to paddle and exit the kayak.
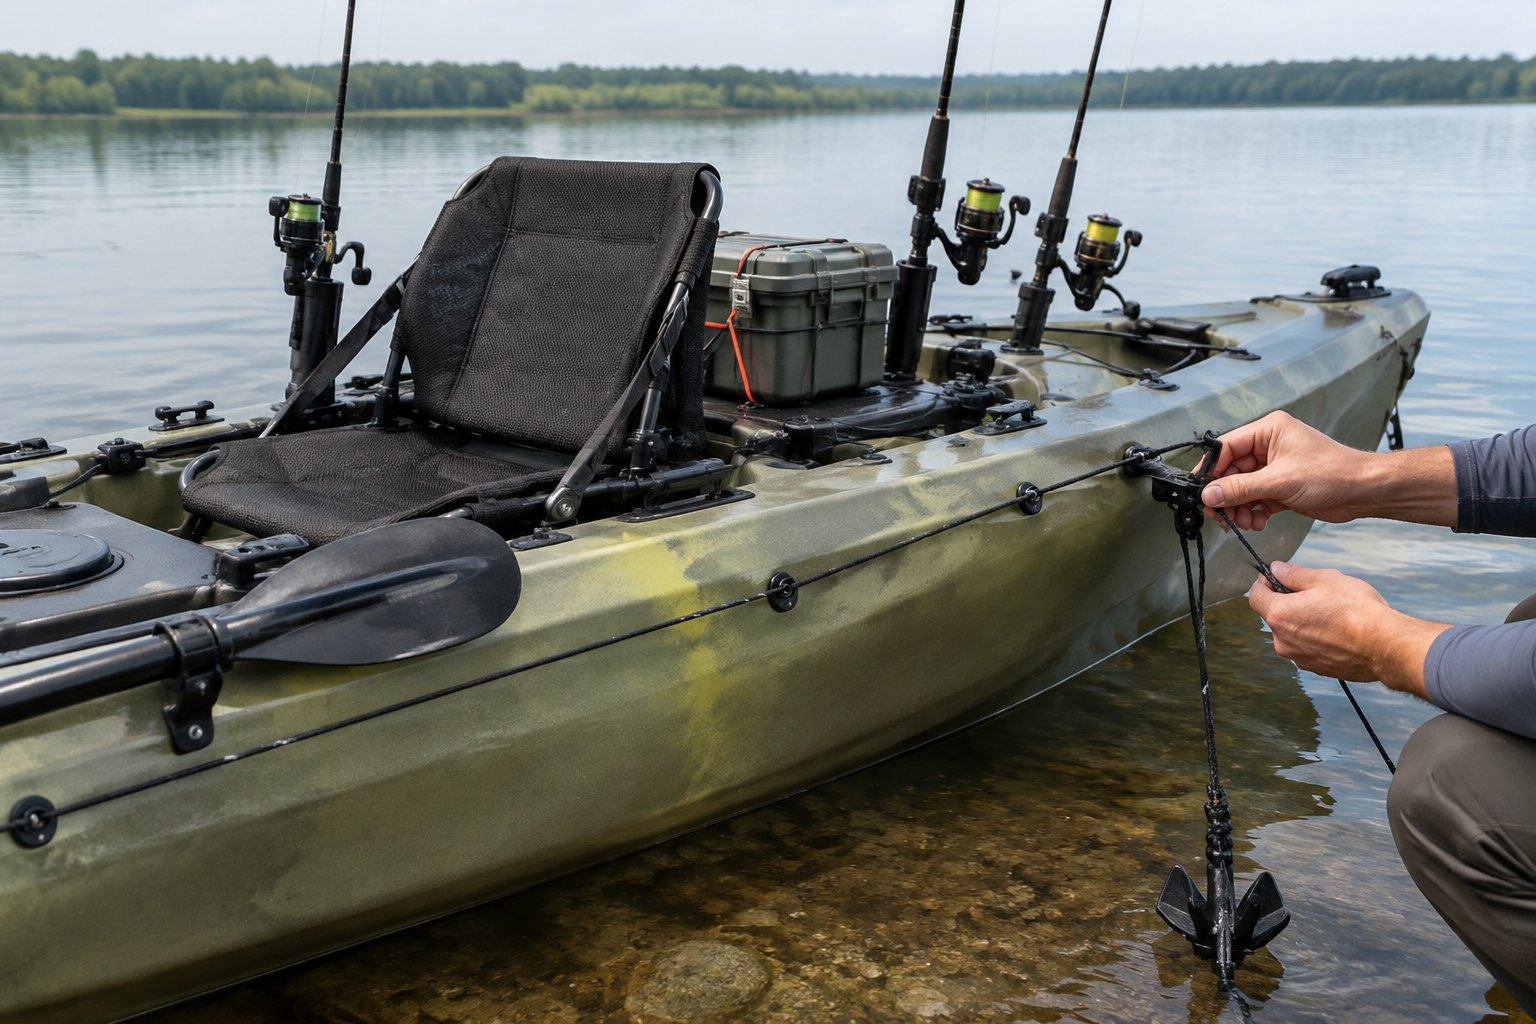
When planning how to rig a fishing kayak, give the anchor special care. A loaded anchor line attached beside the seat exposes the hull broadside to current and increases capsize risk. Our approach starts with a clear deck and treats anchor release as part of the installation.
Step 1: Plan Your Essential Gear and Seated Reach
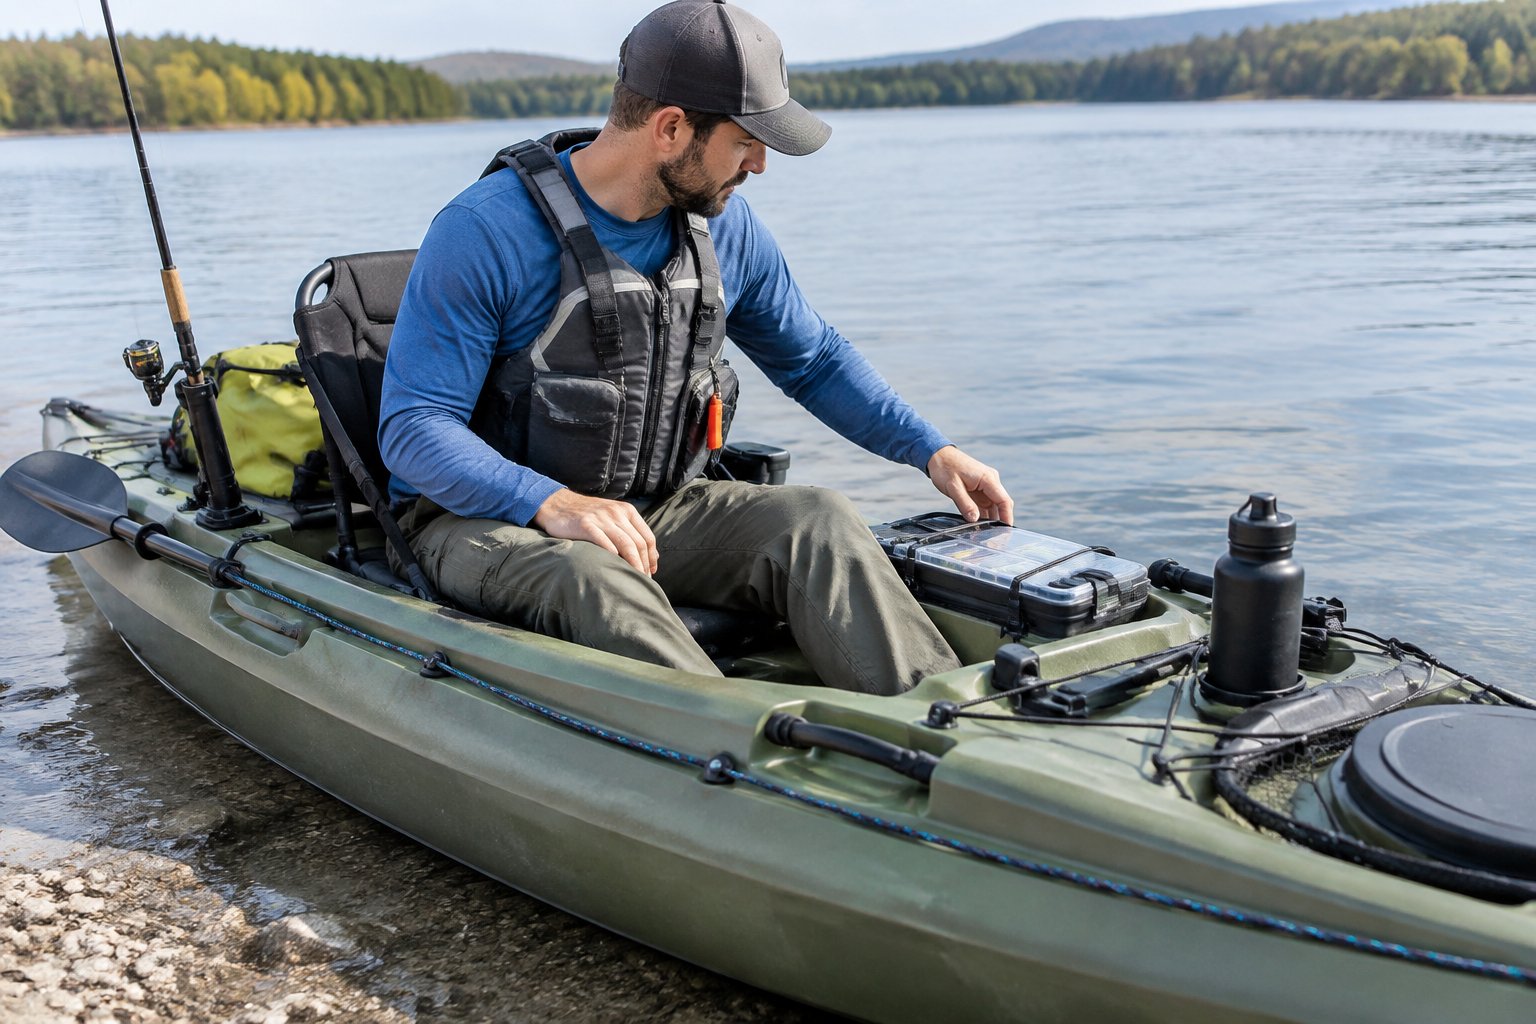
Our first recommendation is to lay out your fishing kayak while sitting in the seat, before drilling any holes. Support the hull securely on a suitable surface, adjust the footrests, and wear your PFD during the check.
Start your kayak fishing setup with a rod, a compact tackle box, landing tools, and accessible safety gear. Place frequently used items within reach and keep your weight centered.
- Keep the paddle park clear beside the seat.
- Put pliers and line cutters in a dedicated pouch.
- Leave foot space open for entry and exit.
- Keep emergency equipment accessible if you become separated from the kayak.
A sit-on-top kayak offers an open deck and a rear tank well. A sit-in kayak needs a layout that preserves the cockpit opening and access to any spray-skirt release.
Check the manufacturer’s load limits before adding accessories. Count your body weight, drinking water, and every piece of equipment. For kayak rigging, we favor removable mounts until you have confirmed the layout is comfortable on the water.
Step 2: Fit Your Safety Gear and Secure Your Paddle
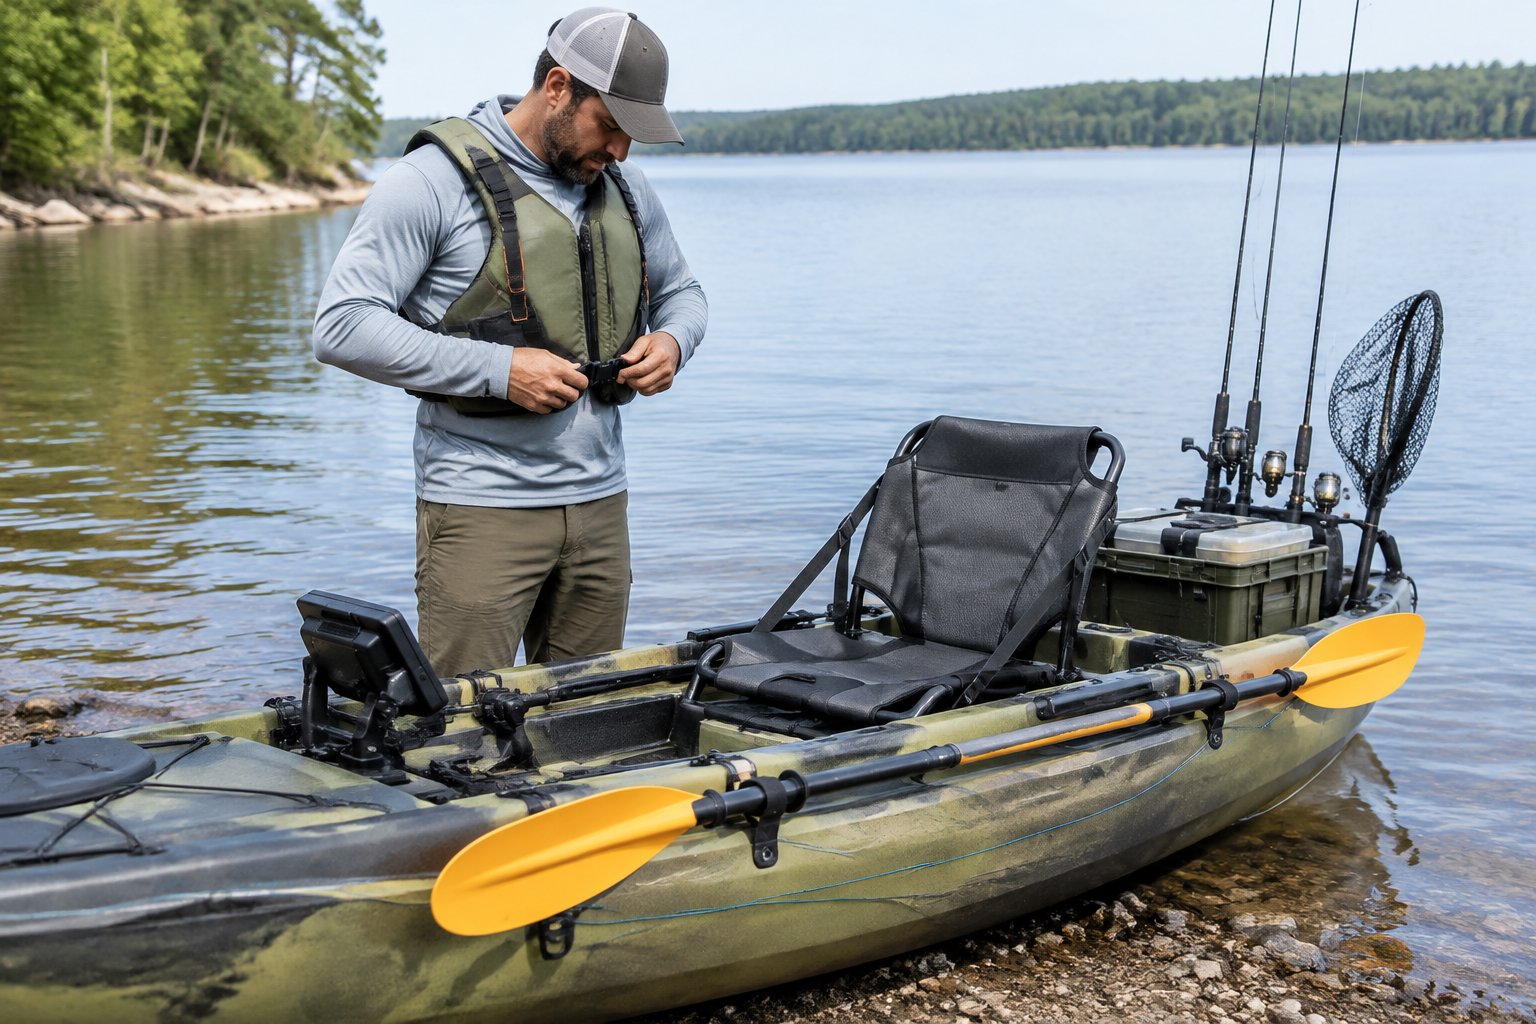
We recommend wearing a properly fitted fishing PFD throughout every outing and keeping your paddle immediately accessible. Choose a U.S. Coast Guard-approved model suited to your activity, body size, and conditions.
Check your life vest’s fit while seated in a kayak. Fasten every closure, tighten the straps evenly, and simulate full paddle strokes. The vest should stay snug without riding up or pressing into your throat.
Keep a whistle and a suitable line-cutting tool on your PFD. Protect your communication device from immersion, dress for the water temperature, and check the safety equipment your kayak trip requires before launching.
For calm, unobstructed water, a short paddle leash attached to a suitable kayak fitting can help retain a dropped paddle. Route it away from your legs and anchor controls, and use an accessible release. We advise against paddle leashes in whitewater, surf, or moving water with snag hazards, where entanglement increases capsize and drowning risk.
Fit a paddle park even if you use a leash. Confirm that you can release the paddle with one hand.
Step 3: Choose a Trolley Kit and Match Your Anchor to the Water
We recommend choosing an anchor trolley system with corrosion-resistant hardware, smooth pulleys, and a lock you can operate from the seat. Match its mounting hardware to your hull construction and the access available behind the mounting surface.
A complete kayak anchor trolley kit should include the trolley cord, end pulleys, a traveling ring, line guides, and a locking device. The YakAttack LeverLoc uses a lever-operated clamp to hold the trolley cord in position. Check the exact kit contents and mounting instructions before buying.
Choose your kayak anchor by bottom type and exposure:
- Folding grapnel anchor: Compact storage; its flukes grip some rough bottoms but can snag rocks and submerged wood.
- Mushroom anchor: Suited to soft mud and sheltered water; holding power depends on the bottom and design.
- Stakeout pole: Useful in shallow water with a penetrable bottom. Keep it outside the hull unless the kayak has an approved pole mount.
- Drift sock: Slows drift in open water without holding a fixed position.
- Drag chain: Adds snag risk in moving water. We advise beginners to leave it out of their setup.
Anchor weight alone does not establish holding power or safety. A heavier grapnel anchor still creates dangerous loads in current. When selecting kayak fishing accessories, choose equipment for sheltered practice water first and avoid anchoring in strong current.
Step 4: Install the Anchor Trolley and Test Its Travel
We recommend dry-fitting the entire kayak anchor trolley before making permanent holes. Choose the side that leaves your paddle stroke, landing area, and rudder controls clear.
Gather the kit, its specified drill bits, a screwdriver, marking tape, and hull-compatible sealant. Use backing hardware where the manufacturer requires it.
- Mark the end pulleys. Position them near the bow and stern on suitable mounting surfaces above the loaded waterline. Follow the kit’s placement instructions.
- Check behind each mark. Identify cables, flotation, and access limits. Confirm the fasteners will clear everything inside.
- Mark the lock and guides. Place the lock within comfortable seated reach. Keep the cord alongside the hull.
- Drill and fasten. Use the specified hole sizes and mounting method. Seal penetrations as directed, and avoid crushing the plastic by overtightening.
- Route the cord. Follow the kit diagram through the pulleys and traveling ring. Adjust tension so the loop moves freely without hanging loose.
- Test both directions. Move the ring through its full travel while seated. Check that knots clear the guides and the lock holds.
Allow sealant to cure before launching. Check that the anchor trolley system stays clear of carry handles and reentry handholds.
Step 5: Rig the Anchor Line and Practice Safe Deployment and Release
We recommend a purpose-built anchor-line arrangement that releases from the seat under load. The trolley lock controls the ring’s position, while your emergency release must free the kayak from the anchor rope.
Choose marine anchor rope that works with your cleat or release device. In sheltered conditions, a starting scope is three to five times the water depth. Account for the attachment point’s height above the water and follow the anchor maker’s guidance.
Practice this sequence on calm water with a partner nearby:
- Prepare the release. Follow its routing instructions exactly. Keep the rope contained and clear of your feet.
- Lower the anchor under control. Pay out rope without allowing it to tighten beside the seat.
- Move the ring to the bow. Establish the bow pull point before allowing the kayak anchor to take load.
- Set gently. Let the line tighten gradually while watching your clearance from shore and other boats.
- Practice release. Confirm you can disconnect without leaning, untying a loaded knot, or reaching toward the bow.
Use a float with a compatible quick-release system if you plan to recover the released anchor. Never wrap rope around your hand or body.
For retrieval, paddle toward the anchor while gathering slack. If it snags, release it before pulling hard enough to destabilize the hull. Treat anchoring skills as part of your kayak fishing safety preparation.
Step 6: Position Rod Holders Without Blocking Your Paddle Stroke
Position rod holders around your full paddling motion, including sweep and reverse strokes. Test them with rods loaded because handles and reels take up space beyond the holder itself.
Factory flush-mount rod holders provide compact storage for spare rods. Before adding another, inspect the space below the deck for the holder tube and fasteners. Use a sealed-bottom design where needed to prevent water from entering the hull.
Adjustable rod holders let you control the active rod’s angle. Track-mounted holders and suitable RAM Mounts let you change position as you refine the layout. For trolling, choose a holder and base rated for the load.
Sit in the kayak and check:
- Paddle-shaft and hand clearance on both sides.
- Access to the paddle park.
- Casting clearance around stored rods.
- Reach to each rod handle without a deep backward lean.
Check your forward and steering strokes with the full fishing load aboard. Keep rod retainers short and contained, and lower stored rod tips when traveling beneath branches or docks.
Step 7: Secure Your Tackle Storage and Balance the Load
Place heavy gear low and near the kayak’s center, then secure storage against shifting or escape during a capsize. Balance the load from side to side and check the hull’s trim on the water.
A kayak crate fits many sit-on-top tank wells and keeps tackle boxes together. When choosing among kayak crates, check the footprint against your tank well and leave room for the seat to adjust. Use suitable straps attached to secure fittings, and retain the contents as well as the container.
Keep your kayak fishing tackle selection compact enough that you can retrieve the working box without twisting far behind you. Store loose hooks inside closed boxes, and put frequently used tools near the seat.
A kayak livewell adds water weight, so check capacity and trim again. Secure the tank and battery, protect the pump wiring, and account for water moving inside the tank. We suggest postponing a livewell until you have practiced handling your fishing kayak with a basic load.
Before launching, tug each strap and confirm that storage leaves drainage paths clear.
Step 8: Mount Optional Electronics and Protect the Wiring
Add electronics only after the basic kayak rigging leaves enough room for paddling and landing fish. Place the display where you can read it and reach its controls while keeping your torso centered.
Track bases and compatible RAM Mounts offer adjustable screen placement. Check the mount’s load rating and tighten it according to the manufacturer’s instructions. Position the transducer clear of the anchor rope and any moving propulsion parts.
For the electrical installation:
- Secure the battery low in a protected, manufacturer-approved enclosure.
- Fit the recommended fuse near the positive battery terminal.
- Use wire sized for the equipment’s current draw and cable length.
- Protect connections with suitable marine connectors.
- Add strain relief and secure cables away from moving parts.
- Use proper cable glands for hull penetrations.
Keep excess cable contained inside a protected space. Leave enough movement at adjustable mounts to prevent tension on the connectors.
Power up the equipment ashore, then check the transducer reading afloat. Turn the steering and move the trolley through its full travel while watching for cable contact.
Step 9: Check for Leaks, Snags, and Interference Before Fishing
Inspect the kayak on shore, then take it for a short trial in sheltered water before fishing. Load it as you intend to use it and wear your normal paddling clothing.
Include every new fitting in your kayak equipment inspection:
- Check fasteners and cured seals around hull penetrations.
- Move the anchor trolley through its full range.
- Inspect the anchor line for abrasion and tangles.
- Check the paddle leash for loops near your feet.
- Confirm access to the anchor release and line cutter.
- Open and close hatches, then check their seals.
On the water, practice paddling and reaching for equipment before deploying the anchor. Check that the loaded hull sits level and that the deck drains as designed.
Return to shore and inspect the interior for unexpected water. Identify and repair leaks before another launch. Practice wet exits and reentry with appropriate instruction, a partner, and controlled conditions. Gear placement should support those movements without adding entanglement or capsize risk.
Build a Simple Rig You Can Operate Safely
Our recommended kayak fishing rig starts with accessible safety gear, a clear paddle stroke, and securely contained tackle. Add an anchor trolley only if you have practiced operating its release system from the seat.
Make kayak rigging changes one at a time so you can identify their effect on handling. After each outing, adjust awkward placements and inspect new fittings before launching again.
Frequently Asked Questions
Resolve hull compatibility and mounting questions before buying hardware. The answers below address common choices that affect the installation.
Can you rig a sit-in kayak for fishing?
Use a compact fishing layout for a sit-in kayak that keeps the cockpit opening clear. Choose suitable deck or track mounts, and preserve access to your spray-skirt release if fitted.
Can you install a kayak anchor trolley without drilling?
Use existing manufacturer-approved mounting points or a compatible no-drill system when available. Ordinary adhesive fittings are not reliable for handling anchor loads unless their manufacturer specifically approves that use.
Is one kayak anchor suitable for every bottom?
Choose a kayak anchor for the bottom where you fish most. A grapnel can snag, while a mushroom anchor needs suitable soft ground, so carrying the same anchor everywhere is a poor default.
Does an anchor trolley prevent a kayak from flipping?
We treat a kayak anchor trolley as a positioning tool, not a guarantee against capsizing. Strong current and waves can still create dangerous loads, even when the pull point is at the bow.