Kayaking offers a unique opportunity to get close to wildlife without disturbing their natural habitat. Wildlife photography from a kayak challenges your photography skills and provides an immersive experience with nature. Gliding silently on the water, you’ll find yourself amidst breathtaking scenes, capturing stunning images often unattainable from land.

Before embarking on your kayak photography adventure, it’s crucial to understand the intricacies of photographing on water, select the right equipment, and develop essential kayaking skills. With the proper knowledge and preparation, you can create impressive wildlife images that showcase the beauty of our planet’s diverse ecosystems and inhabitants.
Key Takeaways
- Equip yourself with the right kayak, gear, and photography skills for optimal wildlife photography on water.
- Anticipate weather conditions and practice composing shots from various kayak positions for sharp and captivating images.
- Always prioritize the safety and well-being of wildlife while maintaining a respectful distance during your photography sessions.
Understanding Wildlife Photography on Water
When embarking on a wildlife photography adventure on a kayak, it is crucial to understand the unique aspects of capturing images while on water. This section will provide helpful insights on effectively photographing wildlife when kayaking.
To begin with, selecting the right gear is essential for success. Investing in a high-quality waterproof camera or using a waterproof case for your existing camera is advisable. Additionally, ensure your kayak is stable and user-friendly, especially if you are new to the activity. As suggested on Cool Wildlife, practicing kayaking several times without your camera gear is recommended to get comfortable and confident before loading up your equipment for photography.
When on water, being patient and maintaining a respectful distance from wildlife is essential to avoid disturbing their natural behavior. This allows you to capture more authentic images of the animals in their natural habitat. Make sure to practice stealth and minimize noise when approaching wildlife, as sudden movements can easily scare them away.
Moreover, utilize different techniques to enhance your photography skills in this unique environment. Here are some valuable tips to consider:
- Stability: Ensure your kayak is stable when taking shots to reduce blur caused by unsteady hands or shaky platforms.
- Light: Make use of natural light when possible. Early mornings and late afternoons provide the best lighting for wildlife photography.
- Angle: Experiment with various angles, such as capturing images from a low angle to give an intimate perspective of the wildlife you are photographing.
- Focus: Prioritize autofocus settings that track the subject, helping you maintain sharp images of moving wildlife.
- Safety: Always prioritize your safety and the well-being of the animals. Avoid getting too close to potentially dangerous species or engaging in activities that may cause harm to the environment.
In conclusion, understanding the unique aspects of wildlife photography while on a kayak is crucial to capturing stunning images of nature and wildlife. By following the tips and practicing your skills, you are on your way to creating memorable and captivating photographs from your kayaking adventures.
Choosing the Right Kayak
Stability Factors
When planning on taking wildlife photography while kayaking, stability is a crucial factor to consider. A stable kayak provides the necessary support and balance when capturing images. Fishing kayaks are known to be durable and comprehensive, making them an excellent choice for photography. Some models, such as the Wilderness Systems ATAK 140, come highly recommended for their stability and performance.
Kayak Types
Various types of kayaks can be suitable for wildlife photography. Among them, sit-on-top kayaks stand out due to their versatility and ease of use. These kayaks are more comfortable to get on and off while providing a higher vantage point for better visibility. It’s essential to pick an ideal kayak for stability and maneuverability, such as the Intrepid Magazine’s recommended kayaks.
Another option to consider is using a fishing kayak. As mentioned, these kayaks are designed with stability and load-carrying capacity, making them a solid choice for photographers needing extra equipment support.
Gear Storage Options
Storage space within the kayak is another essential factor to consider. A kayak with ample storage enables wildlife photographers to carry their equipment, including cameras, lenses, and safety gear. Some kayaks have dedicated storage compartments or waterproof bags to safeguard the photographer’s gear. According to Kayak Scout, a quality waterproof camera or a smartphone is an excellent choice for kayaking trips, so make sure your kayak can accommodate your chosen device securely.
In summary, selecting the right kayak for wildlife photography involves considering stability factors, choosing the type of kayak, and ensuring adequate gear storage options. Following these guidelines will help improve your photography experience while kayaking.
Essential Kayaking Skills
Paddling Techniques
To ensure a successful wildlife photography experience while kayaking, it is crucial to master essential paddling techniques. Firstly, focus on holding the pad correctly. Keep your hands shoulder-width apart and use a firm grip. This will enable better control of your kayak.
There are different strokes to learn:
- Forward stroke: Propel the kayak forward by alternating strokes on each side with a rotation of your torso.
- Sweep stroke: Move the kayak to the left or right by making broad strokes on the side opposite to the desired direction.
- Reverse stroke: Slow down or paddle backward using reverse strokes, similar to the forward stroke.
For photographers, it’s essential to maintain stability to avoid tipping while capturing perfect shots. Practice smooth and steady paddling to minimize vibrations to your camera equipment.
Managing the Kayak in Different Waters
Kayaking in varying water conditions requires adaptability. Here is how to manage your kayak in different types of water:
- Calm waters and lakes: Flatwater kayaking is perfect for beginners and wildlife photographers. Focus on perfecting your paddling techniques and staying balanced.
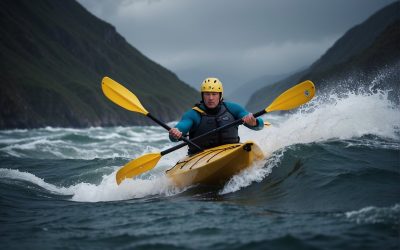
- Ocean and waves: In the sea, it is vital to handle waves and tides. When paddling, ensure the kayak’s bow faces waves at an angle of around 45 degrees, allowing the waves to pass beneath the kayak to reduce the risk of capsizing.
- White water: This environment is challenging and requires advanced skills. Navigating rapids, rocks, and currents demands refined paddling skills and quick decision-making. Wildlife photographers in white water should be well-versed in bracing techniques to maintain stability while framing their shots.
In conclusion, the key to successful wildlife photography while kayaking is mastering essential kayaking skills. Practice paddling techniques and adaptability in different water conditions to make the most of your experience and capture stunning images.
Kayaking Gear and Equipment
Safety First
Safety should always be a top priority when embarking on a wildlife photography adventure through kayaking. Essential safety gear for kayaking includes a personal flotation device (PFD) or life jacket designed for your size and weight. These devices should meet standards set by organizations such as the US Coast Guard or similar international authorities. Wear a high-quality helmet to protect your head from any collision or impact. Additionally, a whistle or other signaling device is helpful in emergencies or drawing attention when needed.
Photography Specific Gear
Investing in reliable photography gear is critical to capturing stunning wildlife shots while kayaking. First and foremost, a waterproof dry bag is essential to keep your camera gear safe and dry. Some popular choices for cameras in a kayak environment are waterproof mirrorless models or possibly housing for DSLRs. A compact tripod with a flexible mount can provide a stable platform for your camera when stationary in the kayak.
To protect your photography equipment, consider the following list of essential items:
- Waterproof camera case or housing
- Lightweight, portable tripod or camera mounting system
- Lens cleaning kit and accessories
- Extra batteries and memory cards
Personal Comfort
Personal comfort is an essential factor to consider for a successful wildlife photography session in your kayak. Wear appropriate clothing and footwear, such as moisture-wicking garments, waterproof shoes, and sunglasses for sun protection. Additionally, have a comfortable seat cushion and ensure your kayak has adequate space for you and your camera gear.
It’s a good idea to have some essential comfort items on hand, such as:
- Snacks and beverages
- Sunscreen and bug-repellent
- A hat or cap for shade
- A dry change of clothes in a waterproof bag
In summary, prioritizing safety, investing in suitable photography gear, and ensuring personal comfort is crucial when preparing for a kayaking adventure to capture stunning wildlife photography.
Camera and Lens Selection
Wildlife Photography Friendly Cameras
When it comes to wildlife photography while kayaking, choosing the right camera is essential. Many options are available on the market, but you’ll want to look for durability, waterproofing, and reliable performance. Some might use a smartphone or a small, waterproof camera to document their kayaking trips. However, a DSLR or mirrorless camera would be more suitable if you are serious about wildlife photography.
Here are a few factors to consider when choosing a camera:
- Durability: The camera should be built to withstand the elements, especially when using it near water.
- Waterproofing: Look for cameras or housings explicitly designed for wet environments.
- Image Quality: High-resolution cameras with large sensors provide better detail and low-light performance.
- Speed: Fast autofocus and continuous shooting capabilities allow you to capture split-second moments.
Choosing Lenses for Distance and Stability
Having the right lens can make a significant difference when photographing wildlife from a kayak. Since you’ll often need to shoot from a distance, a telephoto zoom lens is the most versatile choice. Look for lenses with a focal length of 400mm, 500mm, or even 600mm, as they will allow you to get close-up shots without disturbing the animals.
Here are some factors to consider when choosing a lens:
- Focal Length: A lens with an extensive focal range is essential for wildlife photography from a kayak. This will enable you to get close-up shots of animals without disturbing them.
- Image Stabilization: In a kayak, keeping a steady hand is challenging. Lenses with built-in image stabilization can help reduce camera shake and produce sharper images.
- Aperture: A lens with a large maximum aperture (such as f/2.8 or f/4) will allow you to capture images in lower light conditions, as it allows more light into the camera.
- Weight and Size: Since space is at a premium in a kayak, look for a lens that balances size, weight, and performance.
In summary, when selecting camera gear for wildlife photography while kayaking, prioritize a durable, waterproof camera and a telephoto zoom lens with image stabilization. Remember the importance of focal length, large aperture, and the balance between size and performance.
Correct Camera Settings for Kayak Photography
Mastering Shutter Speed and Aperture
When it comes to kayak photography, understanding how to use shutter speed and aperture effectively can make all the difference. A fast shutter speed helps to minimize camera shake, while a wider aperture allows more light into the camera, resulting in better photos. It is essential to maintain a balance between both settings for optimal results.
- Fast Shutter Speed: A good starting point is 1/1000th of a second or faster. This helps freeze the motion of animals and reduces the chances of blurry images due to camera shake.
- Wide Aperture: Aim for an aperture of f/4 or more expansive. This helps to isolate your subject from the background and allows more light into the camera. The choice of aperture depends on the available light conditions and your desired depth of field.
Remember that you may need to increase your ISO to maintain a fast shutter speed in low-light situations. Experimenting with different settings will help you find what works best for your specific conditions.
Using Filters and Image Stabilization
Filters and image stabilization are invaluable tools for kayak photography. They can improve image quality and help counteract movement and vibration effects.
- UV Filter: A UV filter can protect your lens from water spray and dust while reducing haze in your images. Easy to attach and lightweight, a UV filter should be part of your kayak photography toolkit.
- Vibration Reduction: Many modern lenses and cameras have built-in vibration reduction (VR) or image stabilization. This technology helps minimize camera shake, resulting in sharper images, especially for wildlife photographers on a moving kayak. Make sure to activate this feature if your gear has it.
Consider using a tripod or alternative stabilization methods when setting up your camera for kayak photography. While challenging, photographing wildlife from a kayak offers unique perspectives. With the correct camera settings and gear, you’ll capture stunning images to cherish forever.
Composing the Shot from a Kayak

Framing Techniques
When taking wildlife photography from a kayak, it is essential to utilize various framing techniques to capture the unique perspectives that kayaking offers. Consider the rule of thirds to ensure the subject stands out in the photograph. Divide the frame into nine equal parts by placing your subject near the intersection points of the grid lines.
Another technique is to use natural frames like trees, branches, or rocks to help draw the viewer’s eye to the subject. This can make your photograph more intriguing and provide a better sense of the subject’s habitat.
Experiment with shooting angles for a creative and dynamic composition. For instance, a low angle might provide more emphasis on the subject, while a high angle could offer an expansive view of the surroundings. Be prepared to adapt your position and angle in response to the movement of the subject and lighting conditions.
Understanding Light and Angle
Kayaking in natural light sources creates ample opportunities to capture wildlife in their environment. Please pay attention to the direction of the light and how it affects the subject. Early morning and late afternoon offer the best lighting – as the sun is low on the horizon, creating soft and warm tones, often called the golden hour.
To enhance your wildlife photography from a kayak, focus on side-lighting or backlighting when possible. Side lighting adds depth to the image by producing shadows that define the subject’s texture and features. Backlighting can create a stunning effect with the subject in silhouette against a bright background.
However, avoid direct sunlight or harsh midday light that could result in dark shadows or over-exposed highlights, decreasing the image quality. In these situations, you may adjust your shooting angle or wait for a cloud to soften the light.
By understanding framing techniques and the role of light and angle in composing a shot, you can create engaging and striking wildlife photographs while kayaking. Remember to stay patient and ready to adapt as your position, surroundings, and subjects change throughout the paddling adventure.
Best Practices for Sharp Images

Avoiding Camera Shake
One of the main culprits for blurry images in wildlife photography during kayaking is camera shake. Use a faster shutter speed to minimize camera shake and achieve sharp photographs. This helps to freeze your subject’s motion as well as account for the movement of the kayak. A sturdy monopod or kayak-mounted camera support can also help minimize camera shake. Holding the camera firmly and using your elbows against your body for added support is also recommended.
Focus and Depth of Field Techniques
The proper focus and depth of field are crucial for capturing sharp, eye-catching wildlife images. Here are a few techniques to keep in mind:
- Use the appropriate autofocus mode: Depending on your camera, you may have several autofocus (AF) options to choose from. Continuous autofocus (AF-C or AI Servo) is the best choice for moving subjects, as it will keep tracking the subject as it progresses.
- Select the right focus points: Modern cameras offer various points you can manually select. Choose the focus point that aligns with your subject’s most essential elements, such as the eye or head of an animal.
- Adjust aperture settings: The aperture of your lens determines the depth of field in your images. A larger aperture (a smaller f-number) will create a shallower field depth, which helps isolate your subject from the background. Conversely, a smaller aperture (a larger f-number) will result in a greater depth of field, keeping both the subject and its surroundings in focus.
- Use back button focusing: This technique involves separating the autofocus function from the shutter button, which can help prevent accidentally refocusing on an unwanted scene part when pressing the shutter button. Consult your camera’s manual to set up back button focusing.
By utilizing these techniques, you’ll be well on your way to capturing stunning, sharp wildlife photographs during your kayaking adventures.
Dealing with Weather and Light Conditions

Sunrise and Sunset Photography
When kayaking and photographing wildlife, taking advantage of the optimal light conditions is essential. Early morning and sunset provide the best opportunities for capturing stunning images. The soft, warm light during these times allows for richer colors and can highlight the textures of animals and their surroundings.
To make the most of early morning and sunset photography, remember these key points:
- Plan your shots by checking the sunrise and sunset times.
- Arrive early to your chosen location to set up your gear and ensure you’re ready when the light is just right.
- Be patient and take multiple shots, as light conditions can change rapidly during these periods.
Adapting to Weather Changes
Another crucial aspect of wildlife photography while kayaking is adapting to changing weather conditions. Keeping an eye on the weather forecast can help you plan your trip better. However, it’s essential to be prepared for unpredictable weather changes and adjust your technique and gear when needed.
Follow these suggestions to make the most of changing weather conditions:
- Rain and Overcast Skies: Overcast days can result in even light distribution, reducing harsh shadows and making capturing details in your photographs easier. However, ensure your gear is protected from water damage by using waterproof camera bags or cases.
- Bright Sunlight: While sunlight is essential for photography, excessive brightness can lead to unwanted glare or overexposure. Adjustable polarizing filters can help reduce reflections and balance exposure in high-contrast scenes.
- Wind: Wind can cause both your kayak and subjects to move unpredictably. Use a faster shutter speed to minimize motion blur and ensure sharp images.
Finally, don’t forget to protect yourself from the elements by applying sunscreen and wearing suitable clothing.
By considering the varying light and weather conditions in your outdoor photography, you can capture striking wildlife images that showcase the beauty of nature from a new perspective.
Interacting with Wildlife

Maintaining a Safe Distance
When photographing wildlife from a kayak, it is crucial to maintain a safe distance from your subjects to avoid disturbing them or putting yourself at risk. Different animals have varying comfort levels with human presence, so knowing each species’ boundaries is essential. For example, grizzly bears require more distance than smaller and less aggressive animals.
One way to ensure you keep a respectful distance is to be attentive to an animal’s behavior. If the wildlife appears agitated or starts moving away from you, it’s a sign that you need to increase your distance. Additionally, observe nesting areas and refrain from approaching too close as it may stress the parents and cause harm to the young ones.
Patience and Timing
Patience is a vital ingredient for successful wildlife photography, especially when kayaking. It’s crucial to understand that you are venturing into the animals’ natural habitat and that a great shot often takes time. Therefore, give yourself ample time to observe and appreciate the beauty of the surrounding environment.
Somwaitinggwaiting for that perfect shot may take hours, but it is often worth it. Early mornings and late afternoons can provide the best light for photography and are typically the most active times for wildlife. You may increase the chances of capturing incredible images by aligning your kayak trips with these hours.
When timing your shot, being aware of an animal’s behavioral patterns can help, too. Observe and learn their movements and anticipate when they will likely exhibit specific behaviors like feeding or playing. Patience in these moments allows you to capture compelling images that stand out.
In summary, interacting with wildlife during kayak photography requires a respectful approach and a solid foundation of patience and timing. By keeping a safe distance, waiting for the right moment, and understanding the unique behaviors of various species, you can successfully capture stunning images and create memories to cherish.
Photography from Various Kayak Positions

Photography While Seated
When photographing wildlife from a kayak, the most common position would be to remain seated. Being low in the boat provides a unique perspective on the subjects, capturing their behavior from an intimate angle.
However, photographing from a seated position can also be challenging. Limited mobility in the kayak may restrict some movements for adjusting the camera angle. To overcome these limitations, try the following:
- Use a monopod attached to the kayak’s frame to help stabilize the camera.
- Make sure the seat is comfortable and allows for smooth pivoting motion.
- Practice changing camera settings and locking focus while remaining seated.
Standing in a Kayak for a Better Angle
For photographers who seek a higher vantage point, standing in a kayak can be an option. However, standing in a kayak requires a stable kayak designed for stand-up paddling.
Here are some tips for capturing incredible wildlife photos while standing in a kayak:
- Maintain your balance: Keep your feet shoulder-width apart and knees slightly bent for stability.
- Use a wider angle lens: This minimizes camera shake and accommodates the subjects more easily.
- Hold the paddle horizontally across the boat: Use the paddle for additional support while standing.
Note: Only attempt standing in a kayak if you are experienced and confident in your balance.
Remember to be patient, silent, and respectful of the wildlife in seated and standing positions. This will increase your chances of capturing stunning images while minimizing animal disturbance.
Tips for Long Photography Sessions

Staying Comfortable and Focused
During long wildlife photography sessions when kayaking, it’s crucial to maintain both physical and mental comfort. First, consider bringing a towel for comfort as a cushion or neck support. Patience is essential when capturing wildlife, so relaxing will help increase your chances of getting the perfect shot.
Stability is another crucial factor in kayaking photography. Aim to use a stable kayak, preferably one designed for fishing, as these are made to be steady enough for standing and casting a rod. Such kayaks also serve as excellent photography platforms. It is essential to familiarize yourself with your equipment before heading out, including attaching your camera to a compatible mount or holder on the kayak; this will ensure a smooth photography experience.
Managing Food and Hydration
Long photography sessions can often last hours, so staying well-nourished and hydrated is essential. Pack adequate water and easy-to-eat snacks such as energy bars or fruits. Being on the water can also make you dehydrated faster than usual, so always have more water on hand than you think you’ll need.
Confidently tackle your wildlife photography sessions by staying focused, comfortable, and prepared with essential items. This will better aid your creativity and allow you to capture stunning images while kayaking.
Advanced Kayak Photography Techniques

Capturing Moving Wildlife
One of the main challenges in kayak photography is capturing moving wildlife. The combination of movement between the kayak and the animal can be tricky. To overcome this challenge, use a higher shutter speed than in a stationary setting. A shutter speed of 1/1000s or higher would be ideal for freezing the subject’s motion and the kayak.
Maintaining stability in the kayak while shooting moving subjects is also crucial. Consider keeping a low center of gravity and using a wide stance for better balance. In addition, try using a monopod or a floating camera mount for extra support.
A unique perspective can often be achieved in kayak photography by getting down to the water level. This vantage point allows you to capture stunning reflections and create a sense of intimacy between the viewer and the subject. Be patient, as wildlife can be unpredictable, and success may require multiple attempts.
Creative Compositions
In addition to capturing wildlife in motion, kayak photography can benefit significantly from creative compositions. Here are some ideas to enhance your images:
- Rule of thirds: Place your subject off-center to create a more dynamic image.
- Leading lines: Use natural elements in the surrounding environment, such as the shoreline or a riverbank, as lines that lead the viewer’s eye towards the main subject.
- Framing: Frame your subject with elements like overhanging branches or reeds to add depth and context to the scene.
Kayak wildlife photography can be both fun and challenging. By utilizing these advanced techniques, you’ll improve your skills, capture striking images, and further your enjoyment of this unique photographic adventure.
Post-Production and Editing
When it comes to wildlife photography while kayaking, the post-production and editing process is essential for enhancing the overall quality of your photographs, this section will discuss a few essential editing techniques that help bring the best out of your captured images.
Firstly, selecting a suitable photo editing software to work with is crucial. Adobe Lightroom and Photoshop are popular choices among photographers, while free alternatives like GIMP or Darktable can be equally effective for essential adjustments.
Upon importing your photographs, begin by dealing with the technical aspects. Make sure your images are correctly aligned, and straighten any crooked horizons. A DSLR camera with built-in image stabilization will help reduce the appearance of blurry or shaky images. Still, post-production can further assist in refining the sharpness of your shots.
Next, use the exposure, contrast, and color balance settings to make your photos more visually appealing. Correcting the white balance for wildlife photography will be crucial in showcasing the animal’s natural colors and habitat. Use the following adjustments as a starting point:
- Increase the exposure if your photo appears too dark.
- Enhance the contrast to bring out more details.
- Adjust the color balance or temperature to achieve a neutral or natural look.
Now, let’s focus on the subject of wildlife itself. Particular attention should be given to the animal’s eyes, which are often the central point of interest in wildlife photographs. One helpful tip is to sharpen and brighten the eyes, which helps draw the viewer’s attention.
Additionally, consider using selective editing techniques to increase the vibrancy or saturation of specific areas, such as the animal’s fur or feathers. Bear in mind to adjust the settings moderately, as over-editing could lead to an unnatural appearance.
Lastly, don’t forget to apply noise reduction and sharpening tools if necessary. These two techniques can significantly enhance the overall quality of your photographs, especially when dealing with images taken at a higher ISO or under less-than-ideal lighting conditions.
By utilizing these post-production and editing techniques, you can transform your kayaking wildlife photography into captivating and professional-looking images that showcase the true beauty of nature.
Frequently Asked Questions
What type of kayak is most suitable for stability during wildlife photography?
Regarding stability for wildlife photography, a sit-on-top kayak is generally recommended. These kayaks provide better stability and are easier to maneuver than traditional sit-inside models. Additionally, they offer a larger area to place your camera equipment, making reaching and swapping your gear easier.
How can I protect my camera equipment when photographing from a kayak?
Invest in a quality waterproof bag or case designed specifically for storing cameras and lenses to protect your camera equipment. This will help keep your gear protected from water, sand, and other potential hazards. Learning how to secure your equipment in the kayak properly is also essential to avoid any accidents.
Which camera settings are recommended for sharp wildlife images on a kayak trip?
You are capturing sharp images while kayaking, which requires adjusting your camera settings for the constantly changing environment. Opt for a fast shutter speed of at least 1/1000th of a second to freeze action and reduce motion blur. Set a higher ISO to compensate for the fast shutter speed, and use continuous autofocus to track and maintain focus on your subjects. It is also helpful to shoot in burst mode to capture multiple frames and increase your chances of getting that perfect shot.
What are some effective techniques for taking pictures of wildlife while kayaking?
Practical techniques for wildlife photography while kayaking include:
- Paddling silently and smoothly to avoid disturbing wildlife.
- Be patient and observe animal behavior to anticipate their movements.
- Use a secured, flexible tripod or monopod to stabilize your camera.
- Leveraging natural cover, like reeds or rocks, to get closer to your subjects without scaring them away.
- Shooting from a low angle creates a more intimate perspective of the wildlife you encounter.
Can inflatable kayaks be good options for wildlife photography, and why?
Inflatable kayaks can be a suitable option for wildlife photography due to their portability, versatility, and ease of use. They are lightweight, making them easy to transport to remote locations. Many inflatable models also offer good stability and durability, allowing photographers to navigate shallow waters and reach areas that may be difficult to access in a hard-shell kayak.
Are there specific kayaks recommended for bird photography on water?
While there are no specific kayaks designed solely for bird photography, sit-on-top kayaks with ample storage and stability are generally preferred by wildlife photographers. These kayaks allow the photographer to move around and adjust their position easily without risking capsizing. Additionally, low-profile kayaks are ideal for bird photography, as they create less disturbance and allow the photographer to approach birds without causing alarm.
Conclusion
In conclusion, they are photographing wildlife while kayaking can be a unique and rewarding experience. It allows photographers to capture images from a distinct perspective and get closer to animals without disturbing them. One needs to consider a few key factors to succeed in this endeavor.
Firstly, it’s crucial to choose a suitable kayak. Prioritize stability and consider investing in specialized fishing kayaks, which often come with comfortable, adjustable mesh seats. These seats can significantly improve the overall experience during long hours spent on the water.
Moreover, proper gear protection is essential when out on the water. Invest in a suitable dry bag or waterproof case to guarantee your equipment’s safety. Adding extra padding or towels can protect against potential damage.
Some valuable tips and techniques for kayaking photographers are:
- Stay patient: Wildlife can be unpredictable, so it’s essential to remain patient when waiting for the perfect shot.
- Maintain a safe distance: To avoid disturbing the animals, be respectful and maintain a safe distance.
- Master kayak maneuvering: Simplify your shooting process by mastering your ability to maneuver the kayak while keeping your camera steady, as mentioned by professionals who often photograph waterfowl, raptors, and even grizzly bears.
Finally, continuous practice makes perfect. The more time spent on the water, the better your skills in handling the kayak and capturing stunning wildlife photographs. Combining your passion for photography with the serenity of kayaking in nature can result in a truly unforgettable experience.