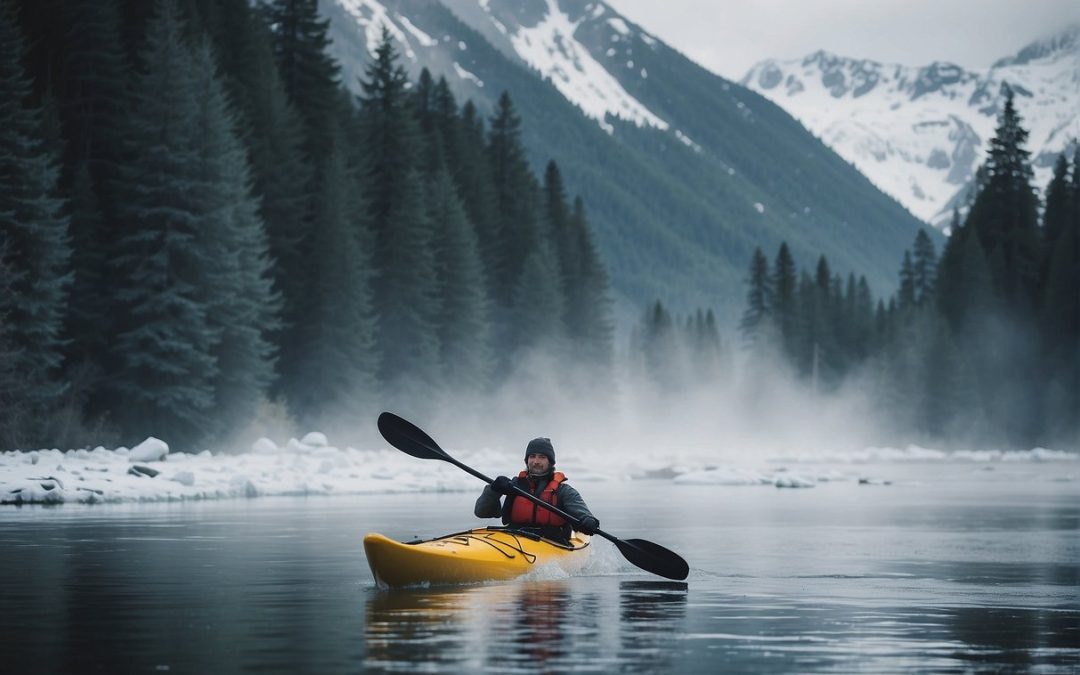
Kayak photography offers unique perspectives and close encounters with nature, especially on-shore photography, where you can capture the beauty of aquatic environments and wildlife. One of the critical factors in successful on-shore photography is understanding the specific challenges and opportunities when using a kayak as your platform. This article will discuss various ideas and methods to help you improve your on-shore kayak photography skills and make the most out of your experience.

To achieve the best results in your on-shore kayak photography, it is crucial to select the right gear that can withstand the harsh marine environment and ensure stability, comfort, and accessibility. Additionally, mastering techniques like lighting and composition, combined with patience, can result in stunning images that showcase the magic of being on a kayak at the water’s edge. Safety and preparation are also essential for your photography adventures. Adequate planning and situational awareness can differentiate between a successful shoot and a dangerous situation.
Key Takeaways
- On-shore kayak photography requires understanding specific challenges and opportunities associated with shooting from a kayak.
- Choosing the right equipment, mastering lighting and composition techniques, and ensuring safety are essential for success.
- Proper planning and preparation can lead to stunning images that capture the magic of aquatic environments and wildlife.
Understanding Kayak Photography
Kayak photography offers unique opportunities to capture stunning images of wildlife and landscapes from a perspective impossible on land. It requires mastering both photography skills and kayaking techniques. This section will briefly overview photography essentials and the specific challenges of photographing from a kayak.
Photography Essentials
Successful kayak photography involves understanding the basic principles of photography, such as composition, exposure, and focus. A tripod is often recommended for stability, although using a full-sized one while kayaking may not be practical. Thus, opting for flexible tripods or alternative stabilization methods such as bean bags can be crucial.
Select the appropriate camera for your needs, as waterproof cameras or smartphone waterproof cases are preferable for kayaking. Additionally, pay attention to camera settings and shooting modes that suit the conditions you’ll be photographing in, such as using a high shutter speed to freeze action or working with a depth of field that keeps your subject focused. Having reliable, waterproof storage solutions for your gear is essential, ensuring they are easily accessible and safe.
Kayak-Specific Challenges
One of the main challenges of kayak photography is maintaining stability while capturing photos. A stable kayak is necessary to avoid motion blur and ensure safety. Some options for increasing kayak stability include using wider kayaks or adding additional flotation devices.
Comfort is also crucial for long photography sessions on the water. Ensuring your kayak has a comfortable seat and good back support can enhance your experience and endurance.
Another challenge is being able to approach wildlife without disturbing them. Kayaks offer a stealthy method to get closer to your subject than other means, but you should still use slow, smooth strokes and be mindful of your movements. To get closer to the action, consider using a telephoto lens or a camera with a good zoom.
Lastly, dealing with changing weather and water conditions can be tricky for kayak photographers. Always be prepared for sudden changes and have an action plan to protect your gear. For instance, keeping your camera in a waterproof bag when not in use will prevent damage from splashes and rain. Be aware of the tides and currents, and plan your photography sessions to avoid hazards.
By having a solid understanding of the essentials of photography and being prepared for the unique challenges of kayak photography, you will be well-equipped to capture incredible images from the water’s perspective.
Choosing the Right Gear
Selecting a Camera for Kayak Photography
When it comes to kayak photography, the choice of camera is crucial. Ideally, it would be best to opt for a DSLR or mirrorless camera system that balances image quality, performance, and durability. Make sure the camera is weather-sealed and has a sturdy build to withstand harsh outdoor conditions. Additionally, consider a camera with fast autofocus to capture fast-moving subjects. Alternatively, point-and-shoot cameras with a waterproof casing can be helpful for close-to-water shots and are generally more affordable.
Essential Kayak Photography Equipment
Once you have chosen the right camera for your needs, you must assemble the rest of your photo gear to ensure success on the water. Here is a list of essential equipment for kayak photography:
- Waterproof/Dry Bag: A durable or dry bag is necessary to protect your camera and other gear from water damage. Ensure the bag is large enough to accommodate all your equipment and has convenient access to avoid missing crucial shots.
- Towel: Always carry a towel to dry your hands before handling your camera equipment, as wet hands can create issues for the camera and other gear.
- Life Jacket: Safety always comes first. Wear a life jacket while kayaking to ensure your safety on the water.
- UV Filter: Protect your camera lens with a UV filter. This will not only help to reduce glare on sunny days but also provide an extra layer of protection for the lens.
- Extra Batteries and Memory Cards: Always carry spare batteries and memory cards to ensure you don’t run out of power or storage space during your kayak photography adventure.
- Tripod or Monopod (optional): A tMonopodr monopod can offer additMonopodtability for shooting from a kayak, especially when using telephoto lenses. However, consider the space and weight constraints and your ability to manage it while on the water.
By carefully selecting the right camera and essential equipment, you can achieve stunning kayak photography results while keeping your gear safe and comfortable during your on-shore adventures.
Safety and Preparation

Weather and Water Conditions
Before embarking on any kayak on-shore photography adventure, it is essential to check the weather forecast and water conditions. The weather can significantly impact your ability to take quality photos and your overall safety. Wind, rain, and ocean swells can make conditions difficult or even dangerous, especially in saltwater environments. Be sure to obtain reliable weather information from a trusted source.
Regarding water conditions, remember that ocean and saltwater environments can be unpredictable and may change rapidly. Being aware of local tides, currents, and any potential hazards in your chosen location is crucial.
Safety Gear and Precautions
In addition to monitoring weather and water conditions, proper safety gear and precautions are necessary for a successful and secure kayaking experience. Some essential items to consider include:
- Life Jacket: A life jacket is a must-have for any water activity. Ensure that your life jacket is the appropriate size and fit for maximum comfort and safety.
- Sun Protection: Sunscreen and protective clothing are essential for safeguarding against harmful UV rays. Always apply at least SPF 50 sunscreen, even on cloudy days, and wear a wide-brimmed hat, sunglasses, and long-sleeve shirt for added protection.
- Stable Kayak: Select a kayak that offers excellent stability to minimize the risk of capsizing. This will improve your safety and provide a more stable platform for capturing those perfect shots.
Finally, always inform someone of your planned kayaking trip, the intended route, and your estimated return time. This will ensure that someone knows your whereabouts and can monitor your safety.
Remember, taking precautions and being adequately prepared increases the likelihood of a successful kayak photography journey and helps ensure that a memorable experience can be captured safely and enjoyably.
Maximizing Stability

Handling Your Kayak
To ensure optimal stability during your on-shore kayak photography session, knowing how to handle your kayak effectively is essential. Start by selecting a stable kayak with a broad base for activities like wildlife photography. Familiarize yourself with the tide and currents by checking the forecast before venturing into the water, as this can significantly impact your ability to maintain stability.
While positioning your kayak, consider using a tripod for added stability. However, be cautious in attaching a tripod to the kayak, as improper installation could hinder your freedom of movement and negatively affect your strength. Another method to improve stability is to use ropes securely tied to nearby objects such as rocks or trees, which will help you reposition yourself without risking accidental movement or tipping.
Securing Photography Gear
Securing your photography equipment is crucial when shooting from a kayak to ensure both the safety of your gear and the stability of your kayak. Store your equipment in a waterproof bag and make sure it is firmly attached to the kayak, minimizing any shifting while paddling or taking photographs.
To further enhance stability, consider taking the following steps:
- Distribute the weight of your gear evenly within the kayak, as this will maintain the kayak’s balance and prevent sudden shifts.
- Secure your camera and lenses with bungee cords or straps to prevent them from accidentally falling or moving during the shooting process.
- If a tripod is used, ensure it is fixed securely to the kayak and leveled correctly to avoid movement during photography.
By prioritizing stability in handling your kayak and securing photography equipment, you can confidently capture stunning on-shore images while enjoying a safe and enjoyable experience.
Lighting and Composition
Working with Natural Light
In kayak, on-shore photography, natural light is crucial in capturing stunning images. The early morning and late afternoon hours provide the softest and most flattering light, helping to avoid harsh shadows that can occur during midday. In addition, these times of day often result in beautiful light reflections on the water, adding depth and interest to your photos.
It is essential to understand your camera settings when working with natural light. Adjusting the ISO and aperture can allow you to capture well-exposed images in various lighting conditions. A lower ISO value is preferred for bright conditions, whereas a higher ISO value helps in dim light situations. Similarly, a wide aperture (lower f-number) lets more light into the camera, while a narrow aperture (higher f-number) reduces the light entering the camera.
Composing Shots on Water
Mastering the art of composition is vital for capturing visually appealing kayak photographs. Here are some tips to help you compose stunning shots:
- Rule of Thirds: Divide your frame into a 3×3 grid and place the main subject at one of the grid intersections to create a balanced and engaging image.
- Leading Lines: Use natural elements such as the shoreline, ripples, or reflections to guide the viewer’s eye toward the main subject.
- Foreground Interest: Including an exciting foreground element, like rocks or plants, can add depth and context to your photos.
- Experiment with Angles: Try capturing images from various angles at water level and higher vantage points to achieve unique perspectives.
In conclusion, you can capture breathtaking kayak on-shore photographs by paying attention to lighting conditions and mastering composition techniques. Don’t be afraid to experiment with different settings and perspectives to achieve the best results for your situation.
Shooting Techniques

Capturing Sharp Images
One of the main challenges in kayak on-shore photography is capturing sharp images while on the move. Here are a few tips and tricks to help you achieve clear, blur-free photos:
- Fast shutter speed: Use a faster shutter speed to freeze the subject’s and the kayak’s motion. A good starting point is 1/1000 of a second, but experiment based on the speed of your motion and the subject.
- Continuous autofocus: Set your camera to continuous autofocus (AF-C or AI Servo) to keep tracking your subject, even as you move around on the kayak.
- Burst mode: Shooting in burst mode allows you to capture multiple images quickly, increasing the probability of getting a sharp, well-timed shot.
- Steady hands: Keep your elbows close to your body and maintain a robust and balanced posture to minimize camera shake. Seth West provides expert tips for better stability while capturing photos from a kayak.
Using Image Stabilization
Image stabilization, also known as vibration reduction, can be valuable in combating camera shake and achieving sharp images. There are different types of image stabilization available:
- In-camera stabilization: Many modern cameras have built-in image stabilization, compensating for camera shake by moving the sensor or adjusting the image processing. Check your camera settings and ensure this feature is enabled.
- Lens stabilization: Some lenses come with built-in image stabilization. When using such a lens, ensure the stabilization feature is turned on. However, remember that stabilization might not be applicable at very high shutter speeds, so it’s best to experiment.
- Tripod or monopod: A tripodMonopodopod can help steadyMonopodmera, especially while taking landscape or long exposure shots. Invest in a lightweight, compact tripod that’s easy to handle on your kayak.
Try different stabilization techniques and find the one that best suits your shooting style and specific conditions. With practice and attention to these tips, you’ll be well on your way to capturing stunning, sharp images during your on-shore kayak photography adventures.
Photographing Wildlife from a Kayak
Kayak-based photography has gained popularity among outdoor enthusiasts, as it allows one to capture stunning images of wildlife from a unique perspective. This section will discuss the importance of patience and the appropriate camera settings for capturing breathtaking images of wildlife from a kayak.
Patience and Timing
Successful wildlife photography from a kayak often comes down to patience, timing, and awareness of your surroundings. Animals like loons and grizzly bears can offer fantastic photo opportunities, but capturing their activities requires significant patience. Many of these animals are wary of humans, so it’s essential to approach them slowly and quietly, allowing them to become comfortable with your presence.
The best time to photograph wildlife from a kayak is often during the early morning or late afternoon when the sun is low in the sky, and the light is soft. This can be incredibly captivating when photographing reflections on calm water. It can also be helpful to familiarize yourself with the behavior of the animals you are hoping to photograph. This will help you anticipate their movements and be ready with your camera when the perfect moment arises.
Appropriate Camera Settings
To capture stunning wildlife images from a kayak, having the proper camera settings in place is crucial. First, a telephoto or zoom lens is recommended to ensure that you can take high-quality images without disturbing the animals. Lenses with focal lengths ranging from 300mm to 600mm are often ideal for this type of photography. It may also be beneficial to utilize a polarizing filter to enhance the quality of images with reflections on the water surface.
Next, consider using a higher shutter speed to capture fast-moving subjects or compensate for the kayak’s motion. This can help to prevent blurry images, especially when photographing animals like birds that are in flight. Additionally, experimenting with different ISO settings can provide optimum results in various lighting conditions. Lower ISO settings will produce less noise in the image, while higher ISO settings may be necessary for achieving faster shutter speeds in everyday light situations.
To summarize, photographing wildlife from a kayak requires patience and careful planning of camera settings, including using a telephoto lens, appropriate shutter speeds, and ISO settings. By following these guidelines, you will be well on your way to capturing stunning wildlife images from the water.
Kayaking Tips for Photographers
Navigating the Water
Regarding photography onshore, kayaking can present unique challenges and opportunities. One of the critical aspects of successful kayak photography is navigating the water effectively. Choosing the right kayak for stability and maneuverability is essential, as it will affect your positioning and ability to capture the perfect shot.
Fishing kayaks or sit-on-top kayaks are excellent options for photographers, as they offer greater stability and an enhanced platform for photography. Fishing kayaks, like the Wilderness Systems Commander 120, are designed to allow standing while casting, translating to better balance and flexibility for the photographer.
Safety gear and preparation:
- Lifejacket: A must-have for safety while on the water.
- Dry bags: Keep your camera and equipment protected from water damage.
- Weather and tide updates: Stay informed about the conditions before setting out.
Positioning for Optimal Shots
Determining the best position to capture that perfect shot from your kayak is a skill mastered through practice and experience. Here are a few pointers to help you along the way:
- Scout the area: Before heading out, research the location, identify critical areas of interest, and plan your route accordingly.
- Be patient and adaptable: Changing weather, lighting, or wildlife behavior may mean adjusting your position and approach.
- Utilize the kayak’s natural advantage: The low vantage point of a kayak can result in unique angles and perspectives that emphasize the subject’s relationship with the water.
- Keep your camera accessible: Ensure a secure and easily accessible storage solution to avoid missing fleeting moments.
- Stability is critical: Spread your weight evenly in the kayak, lower your center of gravity, and use your paddle as a brace to help keep the kayak stable while shooting.
You will find that kayak on-shore photography can be an enriching and immersive experience through consistent practice and incorporating these tips. Embrace the challenges and unique perspective that kayaking offers to capture stunning images.
Advanced Kayak Photography
Landscape and Panorama Shots
Capturing stunning landscape photographs from a kayak can be done using the right equipment and technique. A key factor is using a zoom lens and a DSLR camera to ensure high-quality images. Wide-angle lenses are ideal for capturing large scenes, while telephoto lenses help to bring distant subjects closer.
When framing your shot, consider using the rule of thirds, placing critical elements at the intersecting points. Remember to keep the horizon line straight, as this can be challenging when shooting from the unstable platform of a kayak. Also, a sturdy tripod specially designed for kayaks can be a valuable addition to your gear.
To create a striking panorama, follow these steps:
- Set your camera in manual mode to ensure consistent exposure.
- Use a narrow aperture (f/8 to f/16) to achieve deep depth of field.
- Position your kayak perpendicular to the landscape while turning the camera horizontally.
- Maintain an overlap of around 30% between each frame to facilitate merging in post-production.
Portrait and Action Photography
In addition to landscape photography, kayaks provide a unique opportunity for portrait and action shots. Capturing other kayakers or wildlife in their natural habitat brings life to your images. For compelling portrait and action shots, consider the following tips:
- Use a fast shutter speed: This is essential for freezing fast-moving subjects or action scenes—experiment with shutter speeds of 1/500s or faster, depending on the situation.
- Utilize a telephoto lens: A zoom lens with a focal length of 70-200mm or more enables you to capture subjects safely without intruding into their space.
- Shoot in continuous mode: Capturing multiple frames per second increases your chances of getting the perfect shot during fast-paced moments.
- Consider the lighting: Position yourself relative to the sun to avoid harsh shadows or underexposed subjects. Overcast days provide softer, more evenly distributed light for improved results.
When approaching kayaking photography, always prioritize safety and environmental responsibility by combining these advanced photographic techniques with a passion for the outdoors, stunning and impactful images can be achieved.
Post-Production and Editing

Editing Water and Sky
In post-production, refining the photographs of water and sky is crucial in achieving a dramatic and striking image. One way to enhance water and sky photos is to adjust your photos’ contrast and saturation levels. This helps bring out the rich colors and tones often lost in the original capture. For those using a DSLR camera, shooting in RAW format allows for greater flexibility during editing.
Using graduated filters in your editing software can effectively balance the exposure and depth between the two elements to separate the water and sky in the image. Graduated filters are valuable tools in selectively editing portions of an image. For example, one could darken the sky while keeping the water bright, thus making the overall picture more balanced.
Another important aspect of editing water and sky is sharpening. Images can sometimes look soft with camera systems that might not have the highest resolution. Sharpening tools in post-production can remediate this effect, enhancing the clarity and crispness of the finished photo.
Enhancing Wildlife Shots
In kayaking photography, capturing wildlife in their natural habitat is a prevalent theme. To make these wildlife shots more engaging and lifelike, there are a few essential post-production techniques to consider.
- Cropping: The key to a compelling wildlife image is often getting close enough to your subject. When you can’t physically approach the subject, cropping the image in post-production provides a means to achieve that intimate perspective.
- Exposure adjustments: It’s common for wildlife shots to have inconsistent exposure due to unpredictable lighting conditions. Making minor exposure adjustments in your editing software can help balance the highlights and shadows, bringing out the details in your subject.
- Selective color adjustments: One way to make wildlife stand out in a photo is by selectively enhancing the subject’s color. For example, if you have a colorful bird on a muted background, adjusting the saturation of the bird’s colors can make it more vibrant and eye-catching.
- Noise reduction: Wildlife shots taken with high ISO settings on your DSLR camera may exhibit digital noise, reducing the overall image quality. Applying noise reduction techniques in post-production can help smooth out the grain, resulting in a cleaner-looking image.
Incorporating these post-production methods into your kayak on-shore photography can significantly enhance the final result. Utilizing these editing techniques and your DSLR camera system, you can transform ordinary photos into captivating, professional-looking images.
Protecting Your Equipment

Using Dry Bags and Cases
When embarking on kayak on-shore photography adventures, protecting your camera equipment from water damage is crucial. One of the best ways to do this is by using dry bags. Dry bags are specially designed waterproof bags that protect your precious camera system, including a DSLR camera, from water exposure. Make sure to choose a high-quality dry bag that is the appropriate size for your camera and its accessories.
In addition to dry bags, consider investing in a rain cover for your camera gear. A rain cover provides an extra layer of protection, especially during heavy rain or when your equipment might be exposed to splashes.
Maintenance and Cleaning
Maintaining and cleaning your equipment is essential to keeping it safe and functional during and after your kayak on-shore photography sessions. Here are some tips for maintenance and cleaning:
- Regularly inspect your dry bags and cases for any leaks or damage. Promptly repair or replace them as needed to avoid water intrusion.
- After a kayaking trip, especially in saltwater, rinse your camera system and all accessories with fresh water. This will help prevent corrosion and remove any salt deposits.
- Dry your equipment thoroughly before storing it. You can use soft, lint-free cloths or let the items air-dry in a cool, shaded area.
- Keep your camera equipment clean by removing dust, dirt, and grime using a gentle brush or microfiber cloth.
By following these guidelines and utilizing the appropriate protective gear, such as dry bags and rain covers, you’ll ensure the longevity and reliability of your camera equipment while capturing stunning images during your kayak on-shore photography adventures.
Creative Ideas and Inspiration

Reflections and Symmetry
One of the most eye-catching aspects of kayak photography is the opportunity to capture stunning reflections on the water. To achieve this, look for calm waters and aim to shoot during the golden hour when the light is softest and most flattering. Position your kayak parallel to the shoreline or alongside other exciting compositions, such as overhanging trees or rock formations, to further enhance symmetry. Experiment with different angles, and don’t be afraid to use the selfie mode on your camera to capture your place in the scene.
When photographing reflections, minimizing camera shake is essential to ensure sharp images. Use a shutter speed fast enough to freeze any motion in the water, or use a small tripod-mounted securely on your kayak.
Seasonal Kayak Photography
Kayaking offers a unique perspective on changing landscapes throughout the year. Here are some seasonal ideas to inspire your photography:
- Spring: Capture the vibrant colors of blooming flowers and budding trees along the shoreline. Look for nesting birds or insects on the water’s surface.
- Summer: Embrace the brilliant sunlight and create a dramatic contrast with dark shadows against brightly lit subjects. Photograph fellow kayakers enjoying water sports or beachgoers from a distance.
- Autumn: Document the changing foliage with rich oranges, yellows, and reds reflecting on the water. Seek out wildlife preparing for winter, such as squirrels gathering nuts or birds migrating south.
- Winter: Emphasize the stark beauty of frozen landscapes with ice formations on rocks or snow-covered branches. Bundle up and capture a snowstorm from the water, with snowflakes falling around your kayak.
In conclusion, kayak photography provides endless creative possibilities for capturing the world’s beauty from a unique perspective. By focusing on reflections, symmetry, and seasonal changes, you can create stunning images that showcase the wonder of nature and the joy of exploring new environments from your kayak.
Storage and Accessibility on Kayaks

Efficient Packing
When planning a kayak photography trip, efficient packing is essential to maximize storage space. Proper organization allows you to make the most of the limited space available. One helpful method is to categorize your items by their frequency of use. For example:
- Frequently used items: Camera, lenses, dry bag, paddle.
- Occasionally used items: Extra batteries, cleaning supplies, snacks, water.
- Rarely used items: Repair kit, first-aid kit, spare clothing.
You can then pack your items into smaller compartments, prioritizing easy access to frequently and occasionally used items. A dry bag is invaluable for protecting your camera and other sensitive equipment from water and moisture. Ensure your dry bag is packed and secured to the kayak before launching.
Quick Access to Photography Gear
Quick access to your photography gear while on the water is crucial for capturing fleeting natural moments. Here are some tips to achieve that:
- Secure straps: Attach your camera to your life vest or your kayak’s front deck using secure straps, ensuring it is within easy reach for those unexpected photo opportunities.
- Accessible storage: Designate a dedicated, accessible storage spot on your kayak for essential photography gear, such as lenses and spare batteries. A well-organized storage solution can significantly impact your on-water photography experience.
- Optimize your camera settings: Before heading out, familiarize yourself with your camera’s settings and optimize them for on-shore photography conditions. This way, you can quickly adjust settings without fumbling with menus or user interfaces.
While quick access to your gear is vital, safety should always come first. Ensure your equipment is secure and doesn’t obstruct your ability to paddle or destabilize your kayak.
Overcoming Challenges at Sea
Dealing with Saltwater
One of the most common challenges for on-shore kayak photography enthusiasts is dealing with saltwater. Generally, saltwater can corrode any metal parts and affect the performance of your camera. It can cause fogging in the lens and may even lead to permanent damage.
To protect your camera and gear from saltwater’s corrosive effects, ensure you rinse your equipment with fresh water shortly after exposure. Additionally, consider investing in a dry bag to keep your gear safe and dry when not used. On calm water days, be extra cautious of saltwater splashes and avoid changing lenses while on the kayak.
You can utilize waterproof cases or housing for your camera for added protection. These cases will protect your camera from saltwater and other potential hazards like sand and dust (Paddling Magazine).
Coping with Ocean Currents
Ocean currents can make capturing stable and clear images difficult, especially in a kayak. To overcome these challenges, developing a strong foundation in kayaking skills and balance is essential. Practice paddling in various water conditions to improve your ability to maintain a stable position in the kayak while taking photographs (Wilderness Scotland).
Here are a few tips to help cope with ocean currents:
- Use a monopod or tripod: These supporting devices can help stabilize your camera and improve the quality of your shots. Some tripods are specially designed for water use and can be a great addition to your gear.
- Choose a stable kayak: Opt for more comprehensive, more stable kayaks to provide better balance when taking photos.
- Positioning: Position your kayak perpendicular to the current to minimize the effect of ocean currents on your shots.
By developing your kayaking skills and understanding how to deal with saltwater and ocean currents, you can master the art of on-shore kayak photography and capture stunning images of the natural world.
Frequently Asked Questions
What are some innovative ideas for photographing kayaks when on shore?
Experiment with different perspectives by getting low to the ground or shooting from a higher vantage point. Using natural elements like driftwood, rocks, and sand patterns frame the kayak. Capture the kayak against the backdrop of a scenic sunset, or sunrise, or incorporate exciting textures in the foreground to add depth to the composition.
What equipment do you recommend for high-quality beach kayak photography?
Invest in a quality DSLR or mirrorless camera and a versatile zoom lens (e.g., 18-55mm or 24-70mm) that allows for flexibility in composition. A waterproof camera bag and protective UV filters for the lenses are essential. Consider using a tripod (or monopod) for stability of Monopodrp images, especially in low light conditions.
What precautions should be taken when handling camera gear during kayaking excursions?
Store your camera in a waterproof bag or case, and use a dry bag for extra protection. Keep a microfiber cloth handy for wiping water droplets or sand off the camera and lenses. Attach a floating strap to the camera for added security, and consider using a hard-shell waterproof case for your smartphone if you plan on using it for photos.
How can I ensure my safety while focusing on photography in a kayak?
Always wear a lifejacket, and consider using a sit-on-top or stable fishing kayak with room for gear. Let someone know your planned route and expected return time. Monitor weather conditions before and during your excursion, and avoid paddling alone, especially in unfamiliar areas.
What are the best types of kayaks for photographers, particularly for bird photography?
Kayaks with wide, stable hulls (such as fishing kayaks) generally offer better stability for photography. Roomy cockpits with storage for camera gear are essential. Opt for quiet, efficient propulsion systems, like pedal-powered or electric motor-driven kayaks, to avoid disturbing wildlife.
Can you suggest some effective techniques for capturing dynamic kayak photos on the beach?
For soft, warm lighting, capture photos during the golden hour (shortly after sunrise or before sunset). Experiment with panning shots: use a slower shutter speed and move the camera to follow the kayak in motion, creating a sense of movement. Pay attention to the background of your photos and align the kayak with visually striking elements like waves or dramatic clouds.
Conclusion
Incorporating on-shore photography methods while kayaking can significantly enhance the visual storytelling experience. Using various techniques and tips, kayakers can capture stunning images that uniquely present the environment.
Some of the critical aspects for improving on-shore kayak photography include:
- Ensuring stability in the kayak to capture sharp images and avoid blurring.
- I am focusing on comfort using a kayak with a comfortable seat and good back support system. Comfort helps in capturing better photos during long sessions.
- Paying close attention to lighting and composition. Natural lighting conditions directly affect the quality of photos, while thoughtful composition can create visually appealing images.
Experimenting with angles and perspectives provides a fresh outlook on familiar landscapes. By capturing shots from various viewpoints, such as low angles to highlight water reflections, or high angles to emphasize the grandeur of nature, photographers can create a dynamic portfolio of images.
In conclusion, the art of on-shore kayak photography requires a perfect blend of technical skills, environmental awareness, and unconditional love for the great outdoors. By keeping these tips in mind, kayakers can expand their creative horizons and produce astonishing images that truly capture the essence of their kayaking adventures.


